Add a form
A form is a data-driven configuration that collects data in Power Pages sites. Forms on pages are created from Dataverse table forms. Dataverse table forms can be created by using the Data workspace or from model-driven apps created in Power Apps. You can use them on pages or with lists to build a complete web application.
Tip
- You can use Copilot to add forms to your Power Pages site. For more information, see Overview of AI-powered and Copilot features in Power Pages .
- We've created a series of tutorials and videos for you to learn to use Power Pages and how create and add a form to a page. For more information, go to Tutorial: Add a form to a page.
To add a form:
Open the design studio to edit the content and components of the site.
Go to the Pages workspace.
Select the page you want to edit.
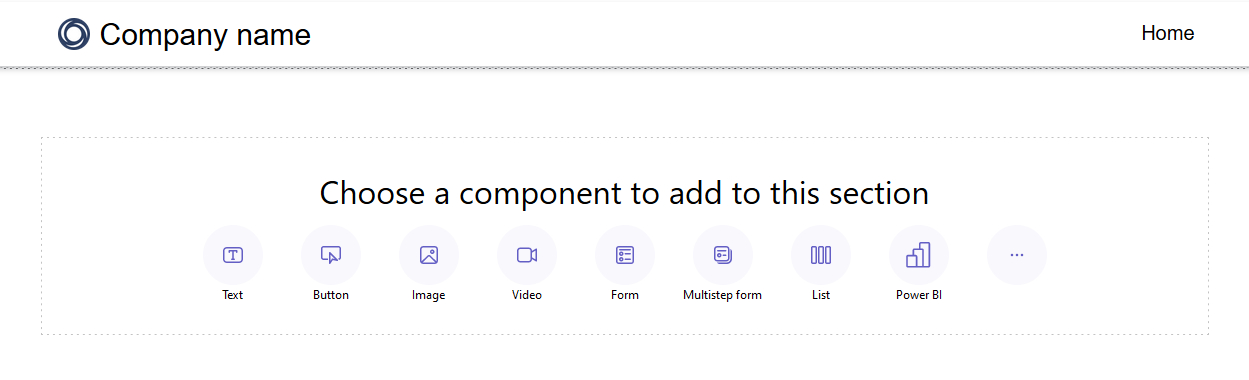
Select the section you want to add the form component to.
Hover over any editable canvas area, then select the Form icon from the component panel.
You can choose either to create a new form or use an existing form (if a maker created one previously).
If you choose to create a new form, you need to enter the following criteria.
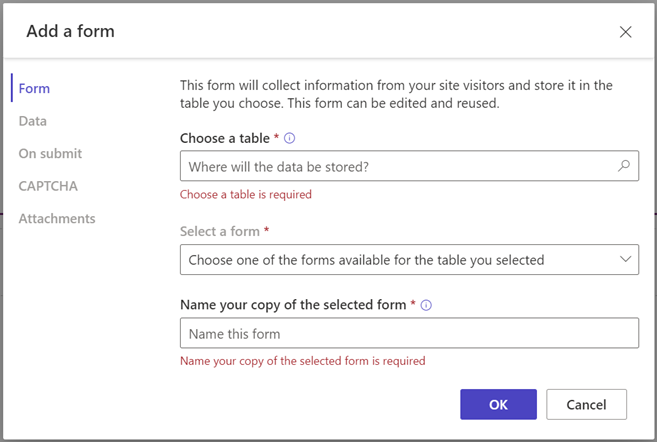
Option Description Choose a table Choose the table where you wish to store the data. Select a form Select one of the Dataverse forms available for the selected table. Name your copy of the selected form Give your copy of the form a name. Data You can choose to have the data entered by a user create a new record, update existing records, or make the data read-only. On submit You can choose optionally to show a success message. You must enter the options to redirect to a webpage and redirect to a URL. CAPTCHA You can choose to show a captcha to anonymous users, authenticated users, or both. Attachments Allows you to enable and configure attachments for the form. Note
You'll need to enable table permissions to ensure that users will be able to interact with the data on the forms.
You can select the ellipsis (...) to duplicate the form, move it up or down within the section, or delete it.
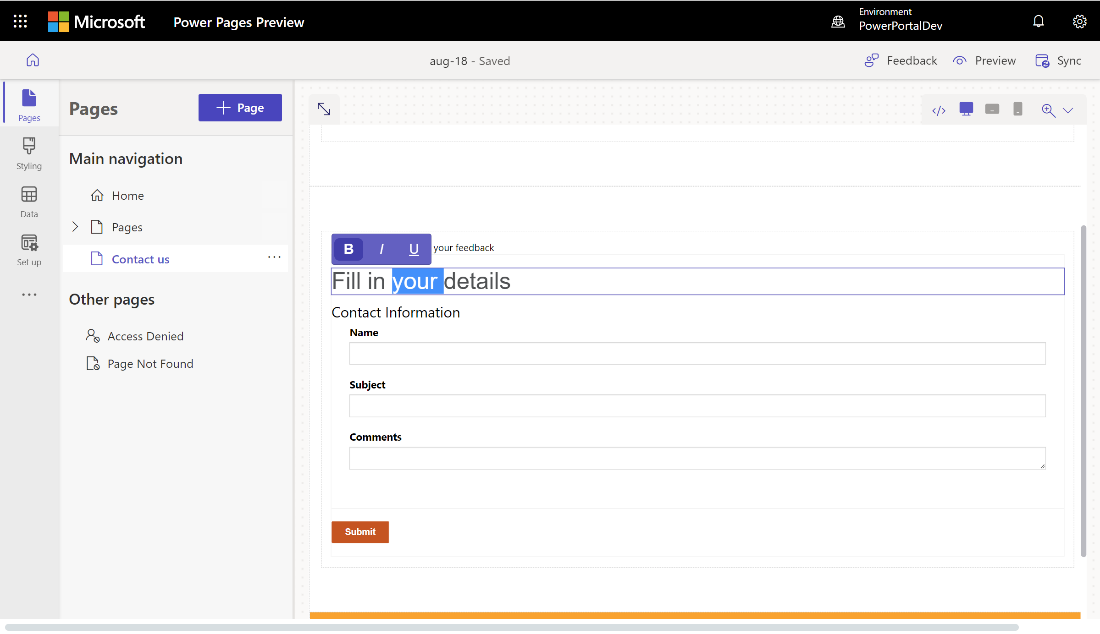
Edit a text field on the form
You can edit text fields, including email, form title, and title section.
To edit a text field on the form:
- Hover and select the text field from the canvas.
- Edit the text field and style it as needed (bold, underline, or italic).
Edit, validate, and delete form fields
Form fields are editable inside of the Pages workspace.
To edit a form field:
Select the field and choose Edit field.
Set properties for your field.
- Update the field's label/display name.
- Mark the field as required, then customize the error message to be shown when the field is required.
- Add a description to the field and adjust its position (choices include above the field, below the field, and above the label).
- Set the validation rules for the field.
- Use the options to configure out-of-the-box validations.
- Use the Regex option to enter custom validation using regular expressions.
Depending on your data type, other properties might be displayed.
Select Done.
To delete a form field:
- Hover over and select the field from the canvas.
- Choose the ellipse ... in the tool bar.
- Select Delete.
Warning
This will also delete the field from the corresponding Dataverse form.
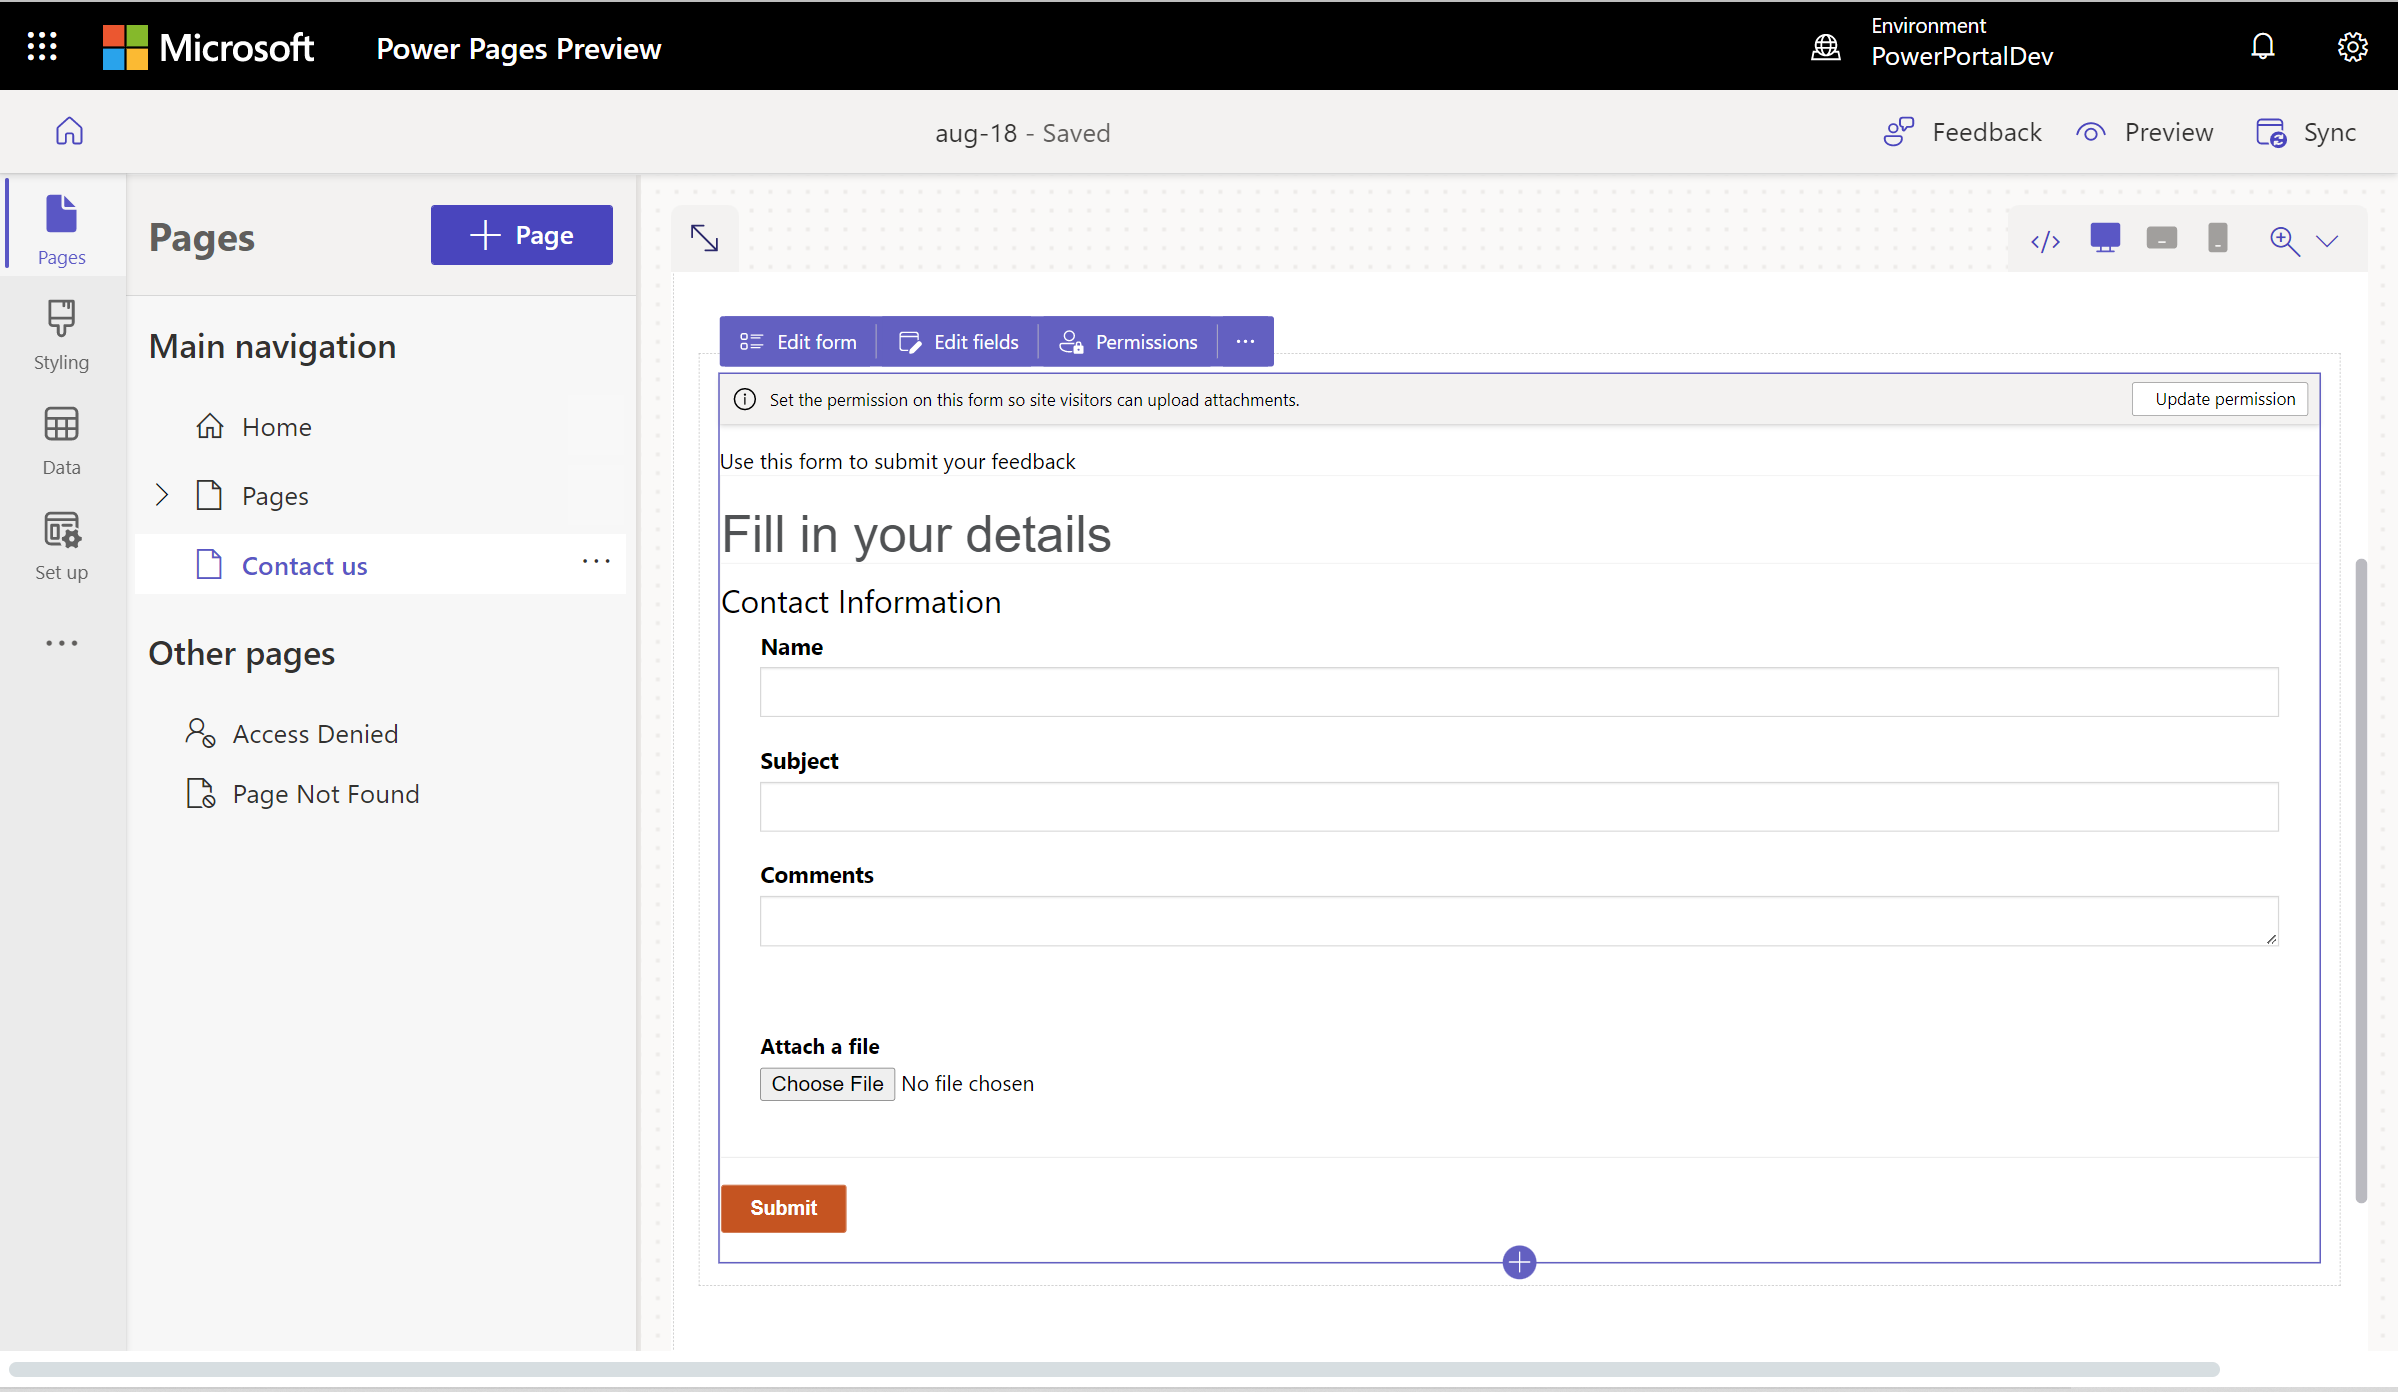
Enable attachments on a form
If attachments are enabled, users can upload an attachment with form submission.
To enable attachments on a form:
Add a form or edit an existing form.
In the Add a form dialog, select Attachments from the left panel.
Turn on the Enable attachments toggle.
Turn on/off the Attachment is required toggle depending on if you want to require the user to include an attachment.
Turn on/off the Allow multiple files toggle depending on if you want to allow the user to upload multiple files.
For Attachment storage, select Notes to save the files in Dataverse or select Azure Blob Storage to store the files in Azure.
Note
Before you can successfully use Azure Blob Storage for attachments, some prerequisites are required:
- The version of the Dataverse Base portal package needs to be at least 9.3.2405.xx. If this requirement is not met, you’ll see a message "To access more controls for file upload, update the Dataverse Base portal package."
- The runtime version of your Power Pages website needs to be at least 9.6.5.1.
- If the site is an existing site and hasn’t opted into new file upload experience, you see a message "To access more controls for file upload, Learn more". You can opt into the new experience by creating a site setting named EnhancedFileUpload with a value of true. New sites are automatically enabled.
If you use Azure Blob Storage, enter values for the Azure storage account name and the Azure container name. Learn more at Enable Azure Storage.
For Maximum number of files, enter the maximum number of files you want to allow a user to upload.
For Upload size limit per file (in KB), enter the maximum size in KB you want to allow per file. The following table shows the absolute maximum file size limits based on the storage option selected:
Storage option Max file size per file Notes 90 MB Azure Blob storage 10 GB Important
If you use notes for storage, make sure the file size limit isn't larger than the email attachment limit set for the environment. For example, if you set the Upload size limit per file to 50 MB but the email attachment limit has the default value of 5 MB, users won't be able to upload files larger than 5 MB.
For File types allowed, select which types of files you want to allow users to upload. The following file types are allowed:
- All
- Audio
- Document
- Image
- Video
- Specific (comma separated values)
Once configured, the file upload placeholder shows in the canvas.
Enabling table permissions
When you add a new form, you see a prompt to set permissions to allow site users to interact with the form. The settings for table permissions are prepopulated (create and append to), but you still need to assign web roles and save the settings. The process automatically creates the child table permissions for the note (annotations) table, which contain the attachments.
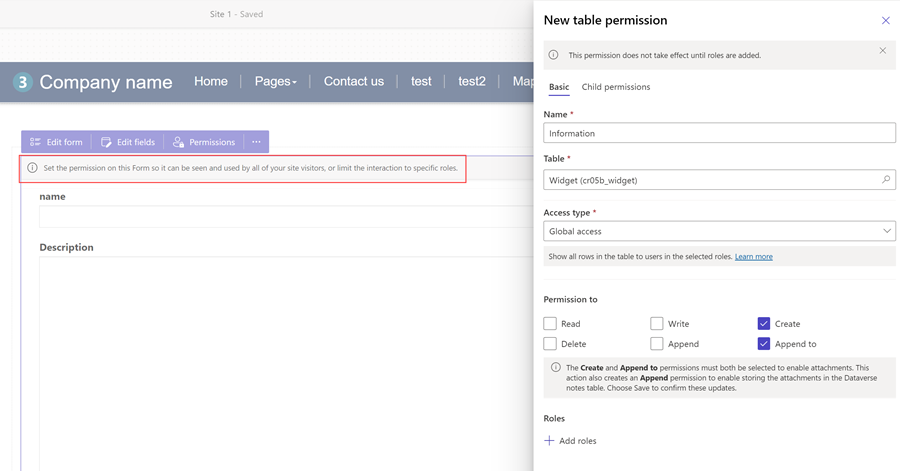
You can also adjust the permissions and assign web roles based on your requirements in the Set up workspace.
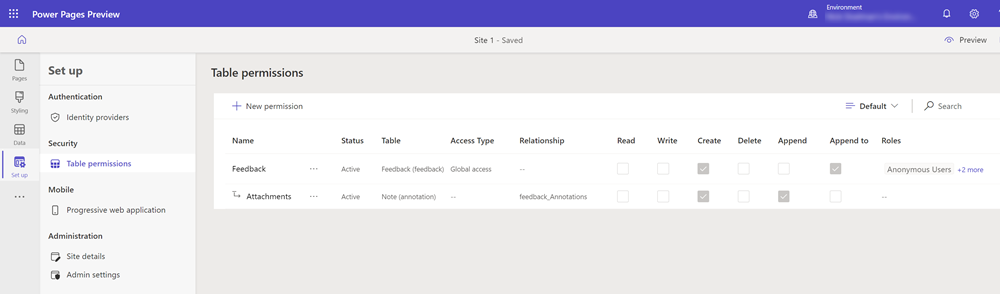
For more information, see Configuring table permissions.
Enable code components on form fields
If a Dataverse form field is configured to use a code component using the Data workspace or a model-driven app, you can enable the code component to be used on a webpage form.
To enable a code component:
Select the Edit code component button from the menu.
Switch the Enable custom component field toggle switch to the on position.
Custom components are now enabled for that field.
Edit code component properties on form fields (preview)
You can also edit the properties of a component from inside the Pages workspace.
Important
- This is a preview feature.
- Preview features aren’t meant for production use and may have restricted functionality. These features are available before an official release so that customers can get early access and provide feedback.
After you enable a code component, properties for that component will appear below the Enable custom component field toggle switch. Set the values for these properties and select Done.
Related information
Feedback
Coming soon: Throughout 2024 we will be phasing out GitHub Issues as the feedback mechanism for content and replacing it with a new feedback system. For more information see: https://aka.ms/ContentUserFeedback.
Submit and view feedback for