クイックスタート: メール通信サービスで複数の送信者アドレスを追加および削除する方法
このクイックスタートでは、Azure Communication Services でメール送信者アドレスを複数追加および削除する方法について説明します。
前提条件
- アクティブなサブスクリプションが含まれる Azure アカウント。 無料でアカウントを作成できます。
- Azure Communication Services メール リソースが作成され、ドメインを追加する準備が整いました。 「メール通信リソースを作成して開始する」を参照してください。
- 既定よりも高い送信制限がプロビジョニングされ、準備が整ったカスタム ドメイン。 「クイック スタート: カスタムの検証済みメール ドメインを追加する方法」を参照してください。
複数の送信者ユーザー名を作成する
メールを送信するようにプロビジョニングされたメール ドメインには、donotreply@xxxxxxxx-xxxx-xxxx-xxxx-xxxxxxxxxxxx.azurecomm.net 形式の既定の MailFrom アドレスがあります。 notification.azuremails.net などのカスタム ドメインを構成すると、既定の MailFrom アドレス に donotreply@notification.azurecommtest.net が追加されます。 さらに MailFrom アドレスと FROM 表示名を構成して追加し、読みやすい値を使用できます。
Note
既定の送信制限がある Azure マネージド ドメインやカスタム ドメインに対して送信者のユーザー名を有効にすることはできません。 詳細については、「Azure Communication Services のサービス制限」を参照してください。
「メール通信リソースを作成して開始する」で作成した電子メール通信サービス リソースの [概要] ページを開きます。
左側のナビゲーション パネルで [Provision Domains] (ドメインのプロビジョニング) をクリックしてプロビジョニングされたドメインの一覧を表示します。
プロビジョニングされたドメインのいずれかをクリックして、[ドメインの概要] ページを開きます。
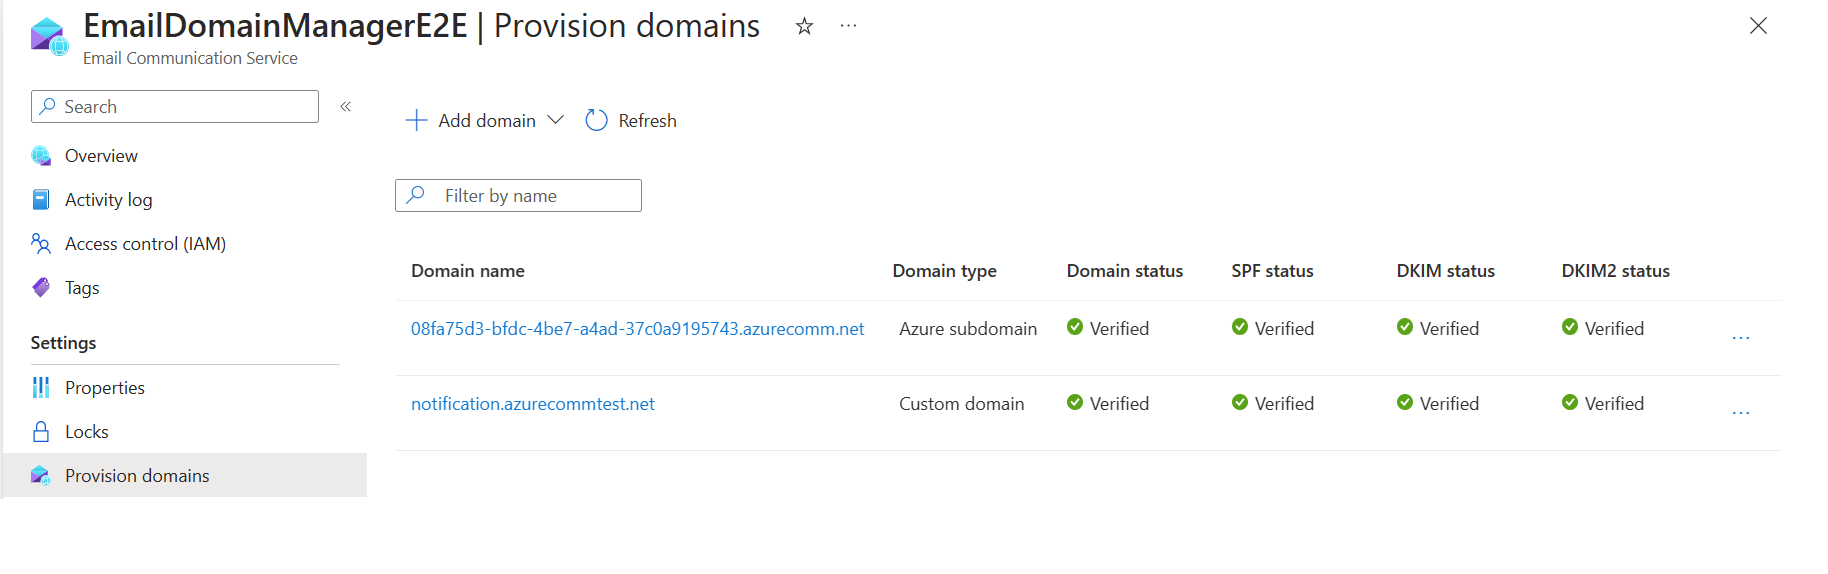
左側のナビゲーションの [MailFrom Addresses] (MailFrom アドレス) リンクをクリックすると、MailFrom アドレスの一覧に既定の
donotreplyが表示されます。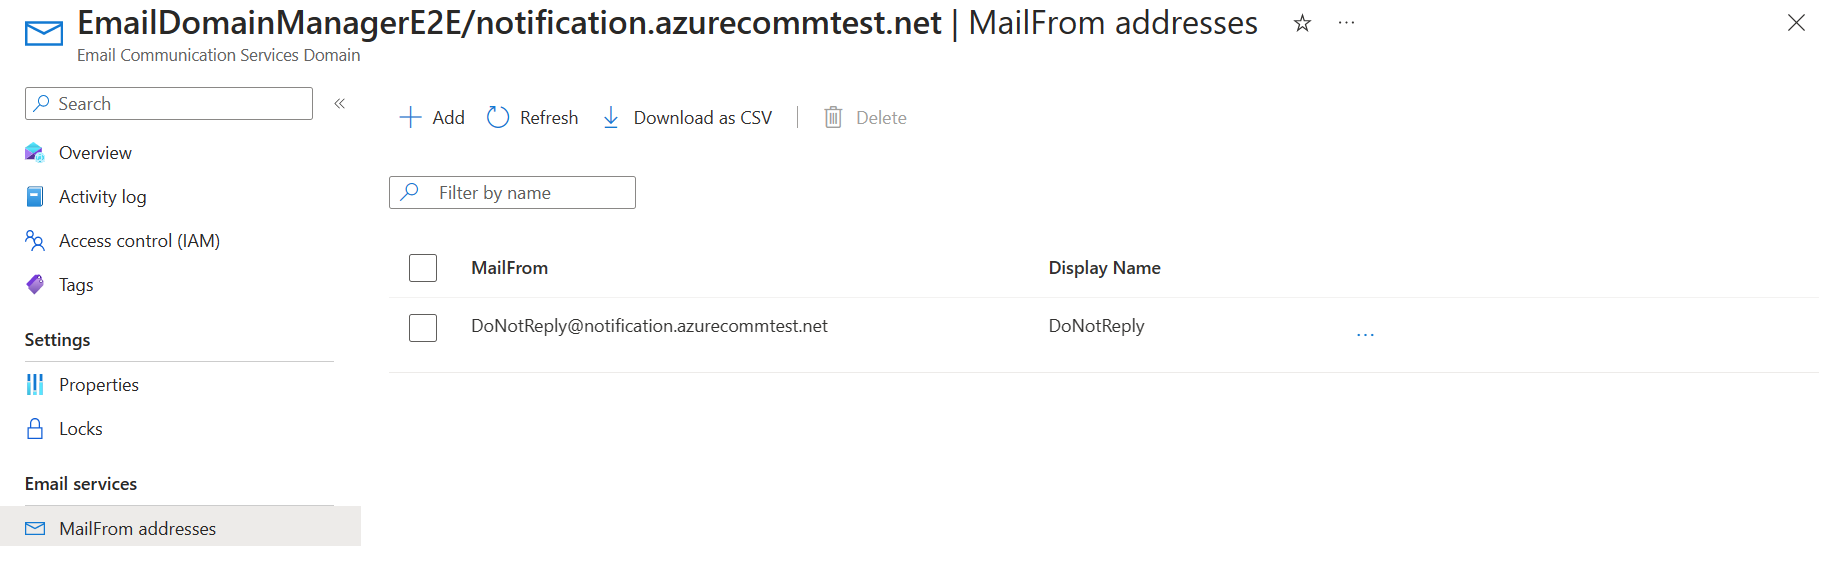
追加をクリックします。
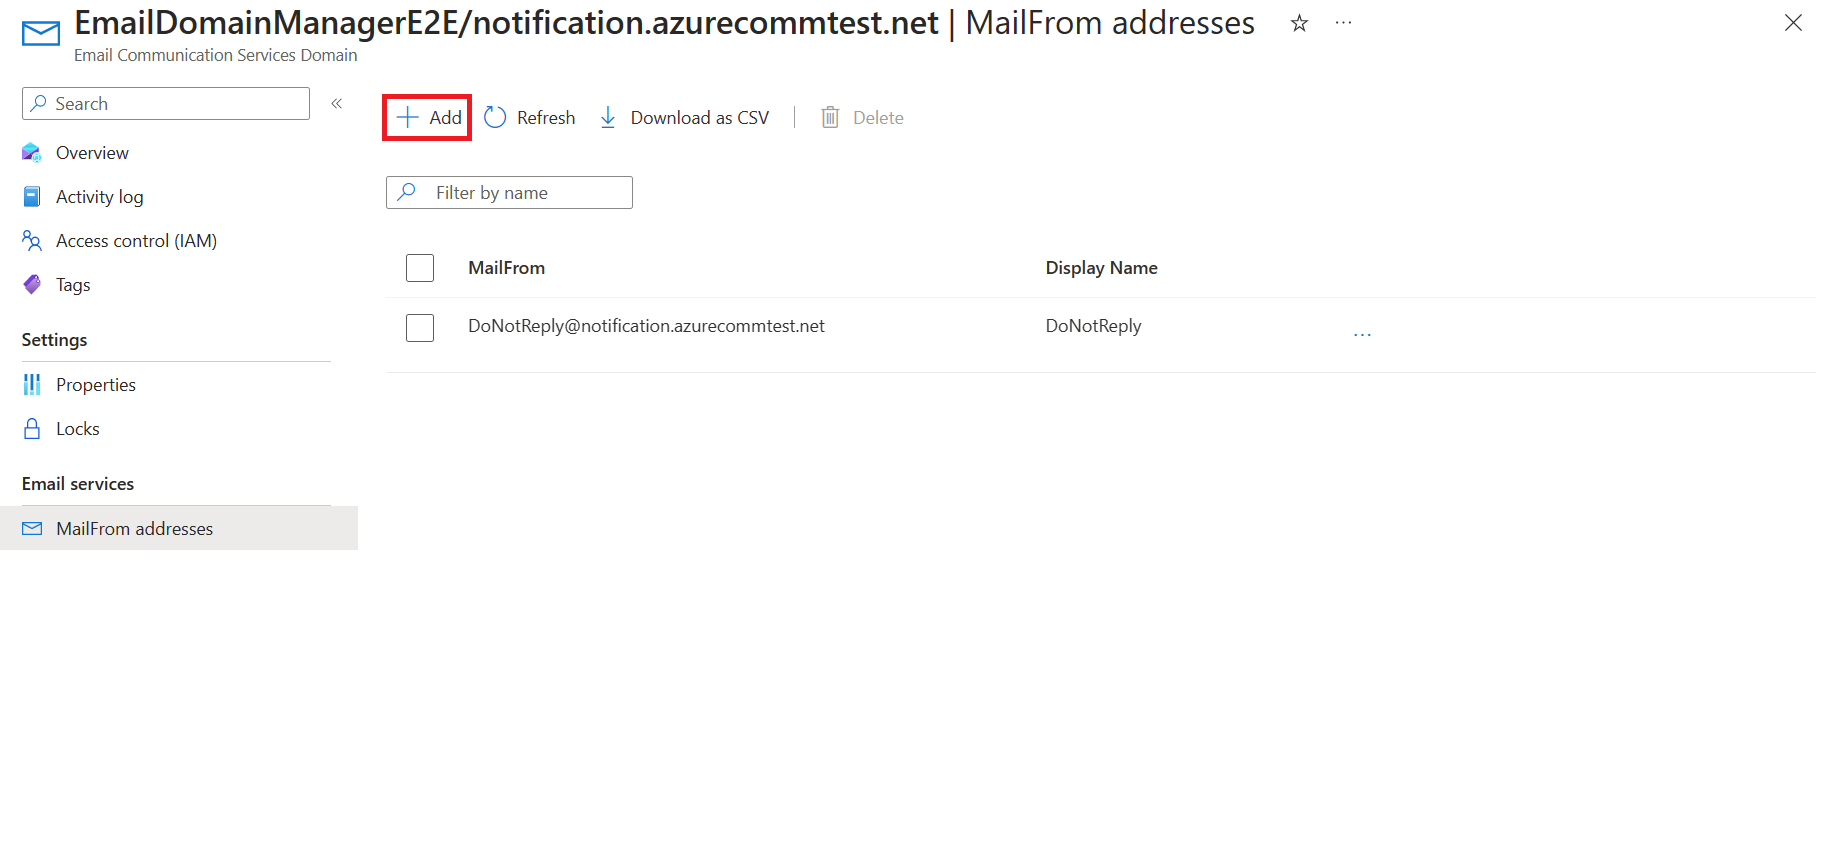
表示名と MailFrom アドレスを入力します。 [保存] をクリックします。
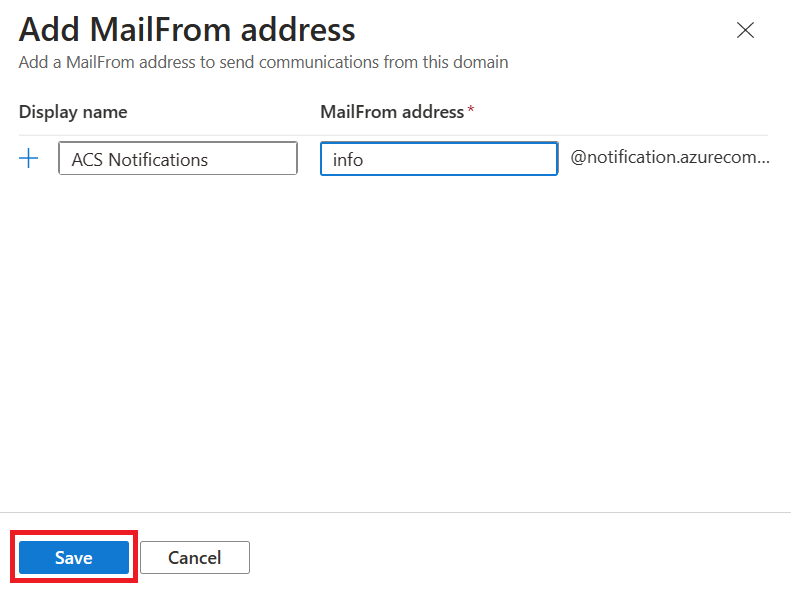
[保存]をクリックすると、概要ページに、新たに追加された MailFrom アドレスを含む更新された一覧が表示されます。
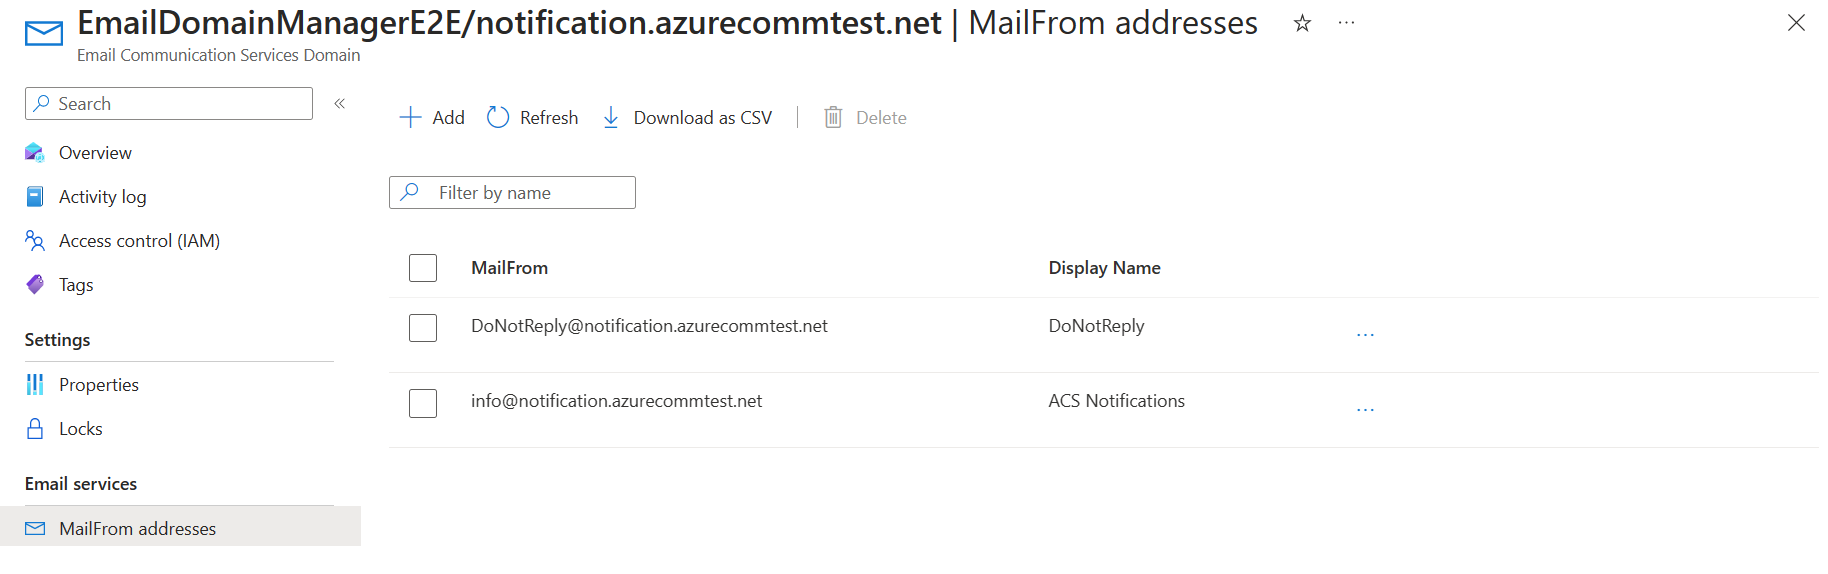


これで、メール ドメインで、この MailFrom アドレスが追加されたメールを送信できるようになりました。
複数の送信者ユーザー名を削除する
ドメインの概要ページを開きます。
左側のナビゲーションの [MailFrom addresses] (MailFrom アドレス) リンクをクリックすると、MailFrom アドレスの一覧が表示されます。
削除する必要がある MailFrom アドレスを選択し、[削除] をクリックします。
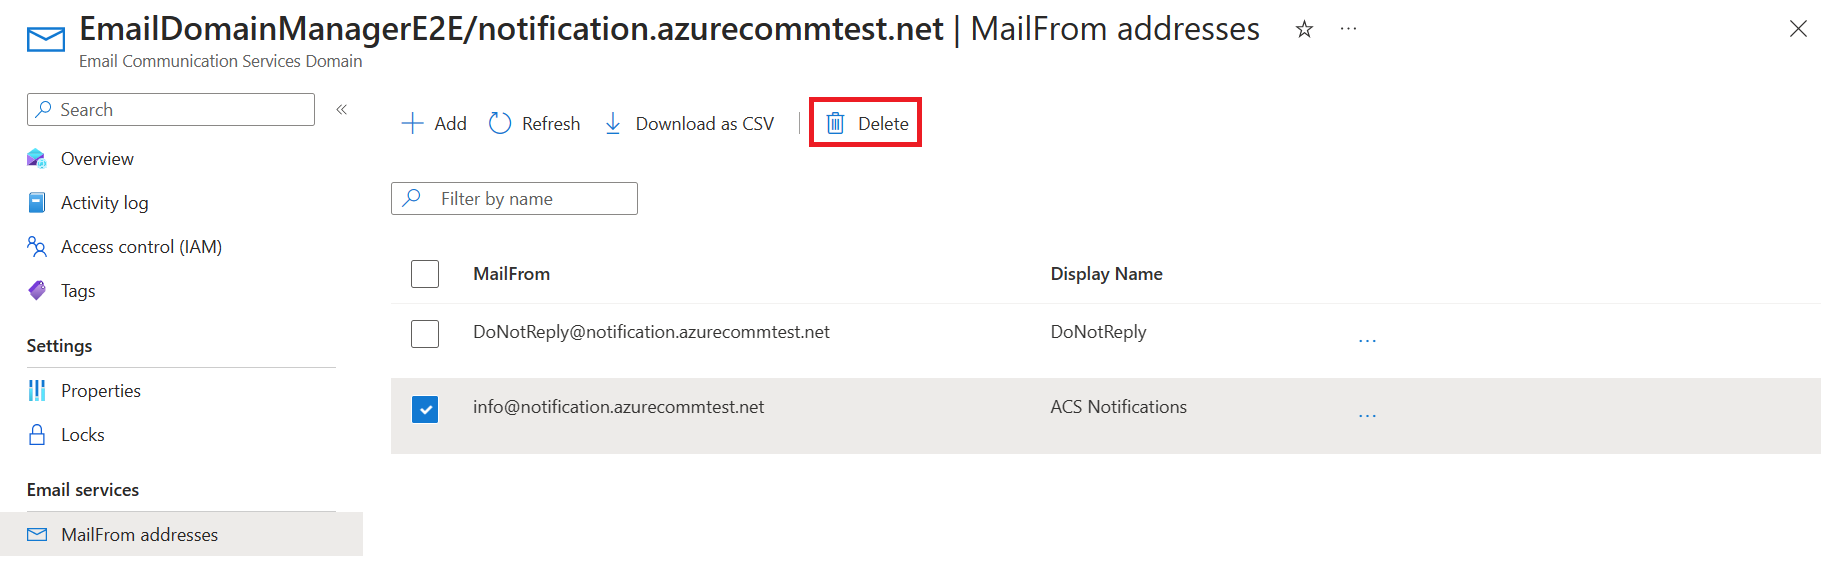
概要ページで、更新された MailFrom アドレスの一覧を確認します。

前提条件
- アクティブなサブスクリプションが含まれる Azure アカウント。 無料でアカウントを作成できます。
- Azure CLI
- Azure Communication Services Email リソースが作成され、ドメインを追加する準備が整いました。 「メール通信リソースを作成して開始する」を参照してください。
- 既定よりも高い送信制限がプロビジョニングされ、準備が整ったカスタム ドメイン。 「クイック スタート: カスタムの検証済みメール ドメインを追加する方法」を参照してください。
センダー ユーザー名リソースを作成する
センダー ユーザー名リソースを作成するには、Azure CLI にサインインします。 ターミナルから az login コマンドを実行し、資格情報を入力してサインインできます。 リソースを作成するには、次のコマンドを実行します。
az communication email domain sender-username create --email-service-name "<EmailServiceName>" --resource-group "<resourceGroup>" --domain-name "contoso.com" --sender-username "contosoNewsAlerts" --username "contosoNewsAlerts"
特定のサブスクリプションを選択したい場合は、--subscription フラグを指定してサブスクリプション ID を指定することもできます。
az communication email domain sender-username create --email-service-name "<EmailServiceName>" --resource-group "<resourceGroup>" --domain-name "contoso.com" --sender-username "contosoNewsAlerts" --username "contosoNewsAlerts" --subscription "<subscriptionId>"
ドメイン リソースは、以下のオプションを使用して構成できます。
- リソース グループ
- メール通信サービス リソースの名前。
- リソースが関連付けられることになる地理的な場所。
- ドメイン リソースの名前。
- センダー ユーザー名の名前。
- ユーザー名の名前。
Note
センダー ユーザー名とユーザー名は同じである必要があります。
センダー ユーザー名リソースを管理する
センダー ユーザー名リソースへの表示名を追加または更新するには、次のコマンドを実行します。 また、特定のサブスクリプションを対象にすることもできます。
az communication email domain sender-username update --email-service-name "<EmailServiceName>" --resource-group "<resourceGroup>" --domain-name "contoso.com" --sender-username "contosoNewsAlerts" --display-name "Contoso News Alerts"

az communication email domain sender-username update --email-service-name "<EmailServiceName>" --resource-group "<resourceGroup>" --domain-name "contoso.com" --sender-username "contosoNewsAlerts" --display-name "Contoso News Alerts" --subscription "<subscriptionId>"
特定のドメイン内のすべてのセンダー ユーザー名リソースを一覧表示するには、次のコマンドを使用します。
az communication email domain sender-username list --email-service-name "<EmailServiceName>" --resource-group "<resourceGroup>" --domain-name "contoso.com"
特定のリソースのすべての情報を一覧表示するには、次のコマンドを使用します。
az communication email domain sender-username show --email-service-name "<EmailServiceName>" --resource-group "<resourceGroup>" --domain-name "contoso.com" --sender-username "contosoNewsAlerts"
センダー ユーザー名リソースをクリーンアップする
センダー ユーザー名リソースをクリーンアップして削除したい場合は、次のコマンドを実行することでセンダー ユーザー名リソースを削除できます。
az communication email domain sender-username delete --email-service-name "<EmailServiceName>" --resource-group "<resourceGroup>" --domain-name "contoso.com" --sender-username "contosoNewsAlerts"
Note
リソースの削除は永続的であり、リソースを削除すると、イベント グリッド フィルター、電話番号など、リソースに関連付けられたデータを含むデータを復元できなくなります。
その他のコマンドの情報については、「センダー ユーザー名 CLI」を参照してください。
前提条件
- アクティブなサブスクリプションが含まれる Azure アカウント。 無料でアカウントを作成できます。
- お使いのオペレーティング システムに対応した最新バージョンの .NET Core SDK。
- .NET Identity SDK の最新バージョンを取得します。
- .NET Management SDK の最新バージョンを取得します。
SDK のインストール
まず、Communication Services Management SDK を C# プロジェクトにインクルードします。
using Azure.ResourceManager.Communication;
サブスクリプション ID
Azure サブスクリプションの ID を把握しておく必要があります。 これは、ポータルから取得できます。
- Azure アカウントにログインします
- 左側のサイドバーで サブスクリプション を選択します
- 必要なサブスクリプションを選択します
- [概要] をクリックします
- サブスクリプション ID を選択します
このクイックスタートでは、 AZURE_SUBSCRIPTION_ID という名前の環境変数にサブスクリプション ID を格納していることを前提としています。
認証
ドメイン リソースと通信するには、まず自分自身を Azure に対して認証する必要があります。
クライアントを認証する
認証されたクライアントを作成する既定のオプションは、DefaultAzureCredential を使用することです。 すべての管理 API は同じエンドポイントを経由するため、リソースとやり取りするために作成する必要があるのは、最上位レベルの ArmClient 1 つだけです。
Azure に対して認証を行い、ArmClient を作成するには、次のコードを実行します。
using System;
using System.Threading.Tasks;
using Azure;
using Azure.Core;
using Azure.Identity;
using Azure.ResourceManager;
using Azure.ResourceManager.Communication;
using Azure.ResourceManager.Resources;
...
// get your azure access token, for more details of how Azure SDK get your access token, please refer to https://video2.skills-academy.com/dotnet/azure/sdk/authentication?tabs=command-line
TokenCredential cred = new DefaultAzureCredential();
// authenticate your client
ArmClient client = new ArmClient(cred);
Azure リソースの操作
これで認証は完了しました。
以下の各例では、センダー ユーザー名リソースを既存のドメイン リソースに割り当てます。
メール通信サービスを作成する必要がある場合、Azure portal を使用してドメイン リソースを作成することでそれを行うか、Azure portal を使用することでそれを行うことができます。
センダー ユーザー名リソースを作成する
センダー ユーザー名リソースを作成する際には、リソース グループ名、メール通信サービス名、ドメイン名、およびリソース名を指定する必要があります。
// this example assumes you already have this CommunicationDomainResource created on azure
// for more information of creating CommunicationDomainResource, please refer to the document of CommunicationDomainResource
string subscriptionId = "11112222-3333-4444-5555-666677778888";
string resourceGroupName = "contosoResourceGroup";
string emailServiceName = "contosoEmailService";
string domainName = "contoso.com";
ResourceIdentifier communicationDomainResourceId = CommunicationDomainResource.CreateResourceIdentifier(subscriptionId, resourceGroupName, emailServiceName, domainName);
CommunicationDomainResource communicationDomainResource = client.GetCommunicationDomainResource(communicationDomainResourceId);

// get the collection of this SenderUsernameResource
SenderUsernameResourceCollection collection = communicationDomainResource.GetSenderUsernameResources();

// invoke the operation
string senderUsername = "contosoNewsAlerts";
SenderUsernameResourceData data = new SenderUsernameResourceData()
{
    Username = "contosoNewsAlerts",
    DisplayName = "Contoso News Alerts",
};
ArmOperation<SenderUsernameResource> lro = await collection.CreateOrUpdateAsync(WaitUntil.Completed, senderUsername, data);
SenderUsernameResource result = lro.Value;

// the variable result is a resource, you could call other operations on this instance as well
// but just for demo, we get its data from this resource instance
SenderUsernameResourceData resourceData = result.Data;
// for demo we just print out the id
Console.WriteLine($"Succeeded on id: {resourceData.Id}");
センダー ユーザー名リソースの管理
ドメイン リソース別に一覧表示する
// this example assumes you already have this CommunicationDomainResource created on azure
// for more information of creating CommunicationDomainResource, please refer to the document of CommunicationDomainResource
string subscriptionId = "11112222-3333-4444-5555-666677778888";
string resourceGroupName = "contosoResourceGroup";
string emailServiceName = "contosoEmailService";
string domainName = "contoso.com";
ResourceIdentifier communicationDomainResourceId = CommunicationDomainResource.CreateResourceIdentifier(subscriptionId, resourceGroupName, emailServiceName, domainName);
CommunicationDomainResource communicationDomainResource = client.GetCommunicationDomainResource(communicationDomainResourceId);

// get the collection of this SenderUsernameResource
SenderUsernameResourceCollection collection = communicationDomainResource.GetSenderUsernameResources();

// invoke the operation and iterate over the result
await foreach (SenderUsernameResource item in collection.GetAllAsync())
{
    // the variable item is a resource, you could call other operations on this instance as well
    // but just for demo, we get its data from this resource instance
    SenderUsernameResourceData resourceData = item.Data;
    // for demo we just print out the id
    Console.WriteLine($"Succeeded on id: {resourceData.Id}");
}

Console.WriteLine($"Succeeded");
センダー ユーザー名を取得する
// this example assumes you already have this CommunicationDomainResource created on azure
// for more information of creating CommunicationDomainResource, please refer to the document of CommunicationDomainResource
string subscriptionId = "11112222-3333-4444-5555-666677778888";
string resourceGroupName = "contosoResourceGroup";
string emailServiceName = "contosoEmailService";
string domainName = "contoso.com";
ResourceIdentifier communicationDomainResourceId = CommunicationDomainResource.CreateResourceIdentifier(subscriptionId, resourceGroupName, emailServiceName, domainName);
CommunicationDomainResource communicationDomainResource = client.GetCommunicationDomainResource(communicationDomainResourceId);

// get the collection of this SenderUsernameResource
SenderUsernameResourceCollection collection = communicationDomainResource.GetSenderUsernameResources();

// invoke the operation
string senderUsername = "contosoNewsAlerts";
bool result = await collection.ExistsAsync(senderUsername);

Console.WriteLine($"Succeeded: {result}");
センダー ユーザー名リソースをクリーンアップする
// this example assumes you already have this SenderUsernameResource created on azure
// for more information of creating SenderUsernameResource, please refer to the document of SenderUsernameResource
string subscriptionId = "11112222-3333-4444-5555-666677778888";
string resourceGroupName = "MyResourceGroup";
string emailServiceName = "MyEmailServiceResource";
string domainName = "contoso.com";
string senderUsername = "contosoNewsAlerts";
ResourceIdentifier senderUsernameResourceId = SenderUsernameResource.CreateResourceIdentifier(subscriptionId, resourceGroupName, emailServiceName, domainName, senderUsername);
SenderUsernameResource senderUsernameResource = client.GetSenderUsernameResource(senderUsernameResourceId);

// invoke the operation
await senderUsernameResource.DeleteAsync(WaitUntil.Completed);

Console.WriteLine($"Succeeded");
Note
リソースの削除は永続的であり、リソースを削除すると、イベント グリッド フィルター、電話番号など、リソースに関連付けられたデータを含むデータを復元できなくなります。
前提条件
- アクティブなサブスクリプションが含まれる Azure アカウント。 無料でアカウントを作成できます。
- Azure Az PowerShell モジュールをインストールする
- Azure Communication Services Email リソースが作成され、ドメインを追加する準備が整いました。 「メール通信リソースを作成して開始する」を参照してください。
- 既定よりも高い送信制限がプロビジョニングされ、準備が整ったカスタム ドメイン。 「クイック スタート: カスタムの検証済みメール ドメインを追加する方法」を参照してください。
センダー ユーザー名リソースを作成する
センダー ユーザー名リソースを作成するには、次のコマンドを使用して資格情報を提供することで Connect-AzAccount を使用して Azure アカウントにサインインします。
PS C:\> Connect-AzAccount
まず、次のコマンドを使用して、Azure Communication Services モジュール Az.Communication をインストールします。
PS C:\> Install-Module Az.Communication
次のコマンドを実行して、カスタム ドメインのセンダー ユーザー名を作成します。
PS C:\> New-AzEmailServiceSenderUsername -ResourceGroupName ContosoResourceProvider1 -EmailServiceName ContosoEmailServiceResource1 -DomainName contoso.com -SenderUsername test -Username test
特定のサブスクリプションを選択したい場合は、--subscription フラグを指定してサブスクリプション ID を提供することもできます。
PS C:\> New-AzEmailServiceSenderUsername -ResourceGroupName ContosoResourceProvider1 -EmailServiceName ContosoEmailServiceResource1 -DomainName contoso.com -SenderUsername test -Username test -SubscriptionId SubscriptionID
ドメイン リソースは、以下のオプションを使用して構成できます。
- リソース グループ
- メール通信サービス リソースの名前。
- ドメイン リソースの名前。
- センダー ユーザー名の名前。
- ユーザー名の名前。
Note
センダー ユーザー名とユーザー名は同じである必要があります。
センダー ユーザー名リソースを管理する
センダー ユーザー名リソースへの表示名を追加または更新するには、次のコマンドを実行します。 また、特定のサブスクリプションを対象にすることもできます。
PS C:\> Update-AzEmailServiceSenderUsername -ResourceGroupName ContosoResourceProvider1 -EmailServiceName ContosoEmailServiceResource1 -DomainName contoso.com -SenderUsername test -Username test -DisplayName testdisplayname

PS C:\> Update-AzEmailServiceSenderUsername -ResourceGroupName ContosoResourceProvider1 -EmailServiceName ContosoEmailServiceResource1 -DomainName contoso.com -SenderUsername test -Username test -DisplayName testdisplayname -SubscriptionId SubscriptionID
特定のドメイン内のすべてのセンダー ユーザー名リソースを一覧表示するには、次のコマンドを使用します。
PS C:\> Get-AzEmailServiceSenderUsername -ResourceGroupName ContosoResourceProvider1 -EmailServiceName ContosoEmailServiceResource1 -DomainName contoso.com
特定のリソースのすべての情報を一覧表示するには、次のコマンドを使用します。
PS C:\> Get-AzEmailServiceSenderUsername -ResourceGroupName ContosoResourceProvider1 -EmailServiceName ContosoEmailServiceResource1 -DomainName contoso.com -SenderUsername test
センダー ユーザー名リソースをクリーンアップする
センダー ユーザー名リソースをクリーンアップして削除したい場合は、次のコマンドを実行することでセンダー ユーザー名リソースを削除できます。
PS C:\> Remove-AzEmailServiceSenderUsername -ResourceGroupName ContosoResourceProvider1 -EmailServiceName ContosoEmailServiceResource1 -DomainName contoso.com -SenderUsername test
Note
リソースの削除は永続的であり、リソースを削除すると、イベント グリッド フィルター、電話番号など、リソースに関連付けられたデータを含むデータを復元できなくなります。
次のステップ
関連記事
- メール クライアント ライブラリについて理解する
- クイック スタート: カスタムの検証済みドメインを追加する方法で、カスタムの検証済みドメインを使用してメールを送信する方法を学習する