创建 Windows Hello 登录应用
这是有关如何创建使用 Windows Hello 作为传统用户名和密码身份验证系统的替代方法的打包 Windows 应用的完整演练的第一部分。 在这种情况下,应用是 WinUI 应用,但与任何打包的 Windows 应用(包括 WPF 和Windows 窗体应用)使用相同的方法。 应用使用用户名进行登录,并为每个帐户创建 Hello 密钥。 这些帐户将受 Windows Hello 配置上 Windows 设置中设置的 PIN 的保护。
本演练分为两部分:生成应用并连接后端服务。 完成本文后,请继续学习第 2 部分: Windows Hello 登录服务。
在开始之前,应阅读 Windows Hello 概述,大致了解 Windows Hello 的工作原理。
开始使用
若要生成此项目,需要使用 C# 和 XAML 的一些体验。 还需要在 Windows 10 或 Windows 11 计算机上使用 Visual Studio 2022。 有关设置开发环境的完整说明,请参阅 WinUI 入门。
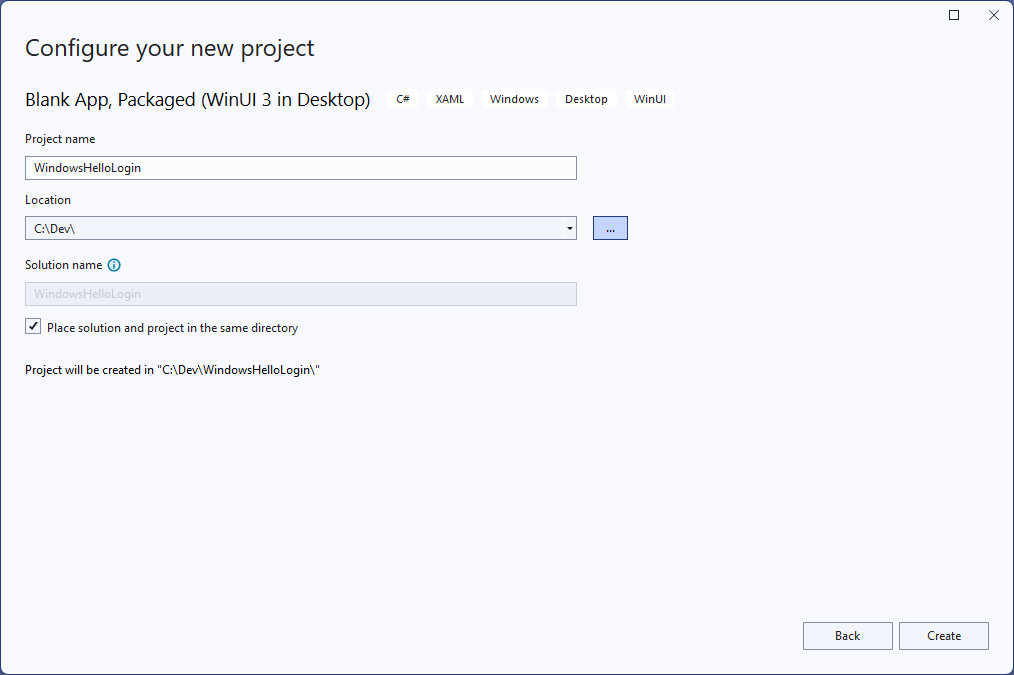
- 在 Visual Studio 中,选择“文件”>“新建”>“项目”。
- 在 “新建项目 ”对话框的下拉列表筛选器中,分别选择 C#/C++、 Windows 和 WinUI。
- 选择 空白应用,打包(桌面中的 WinUI 3) 并将应用程序命名为“WindowsHelloLogin”。
- 生成并运行新应用程序(F5),应会看到屏幕上显示的空白窗口。 关闭应用程序。
练习 1:使用 Windows Hello 登录
在本练习中,你将了解如何检查计算机上是否设置了 Windows Hello,以及如何使用 Windows Hello 登录帐户。
在新项目中,在名为“Views”的解决方案中创建一个新文件夹。 此文件夹将包含将在此示例中导航到的页面。 右键单击解决方案资源管理器中的项目,选择“添加新>文件夹”,然后将文件夹重命名为“视图”。

打开 MainWindow.xaml,并将
Window内容替换为空StackPanel或Grid控件。 加载 MainWindow 时,我们将实现页面导航并导航到新页面,因此我们不需要 MainWindow 中的任何内容。Title在 XAML 中将属性添加到 MainWindow。 该属性应如下所示:Title="Windows Hello Login".从MainWindow.xaml.cs中删除myButton_Click事件处理程序,以避免任何编译错误。 此示例不需要此事件处理程序。
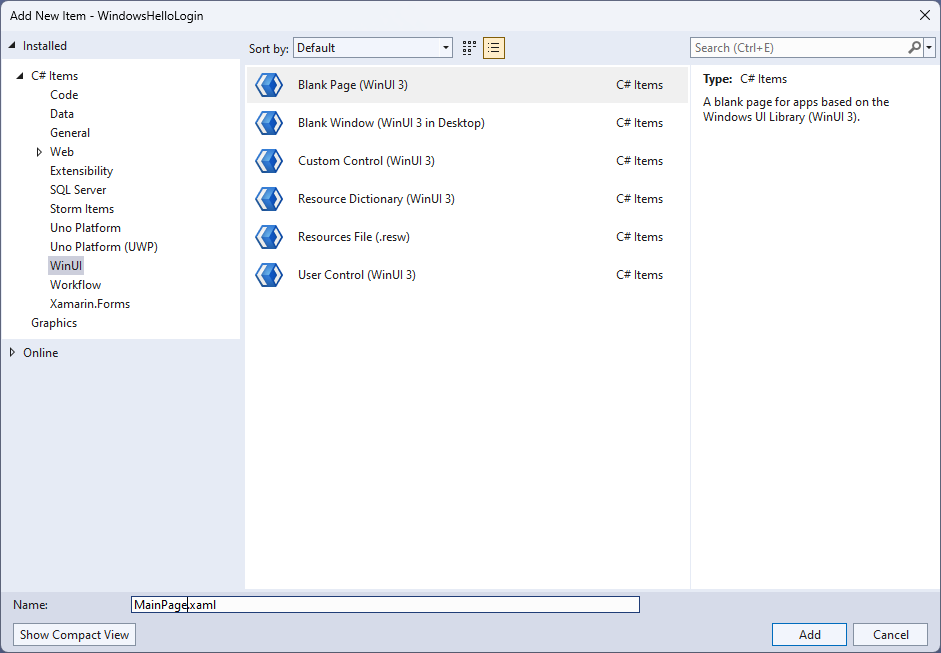
右键单击新的“视图”文件夹,选择“添加新>项”,然后选择“空白页”模板。 将此页命名为“MainPage.xaml”。
打开App.xaml.cs文件并更新 OnLaunched 处理程序以实现应用的页面导航。 还需要添加 RootFrame_NavigationFailed 处理程序方法来处理加载页面时发生的任何错误。
protected override void OnLaunched(Microsoft.UI.Xaml.LaunchActivatedEventArgs args)
{
    m_window = new MainWindow();
    var rootFrame = new Frame();
    rootFrame.NavigationFailed += RootFrame_NavigationFailed;
    rootFrame.Navigate(typeof(MainPage), args);
    m_window.Content = rootFrame;
    m_window.Activate();
}

private void RootFrame_NavigationFailed(object sender, NavigationFailedEventArgs e)
{
    throw new Exception($"Error loading page {e.SourcePageType.FullName}");
}
还需要将四个 using 语句添加到App.xaml.cs文件的顶部,以解决代码中的编译错误。
using Microsoft.UI.Xaml.Controls; using Microsoft.UI.Xaml.Navigation; using System; using WindowsHelloLogin.Views;右键单击新的“视图”文件夹,选择“添加新>项”,然后选择“空白页”模板。 将此页命名为“Login.xaml”。
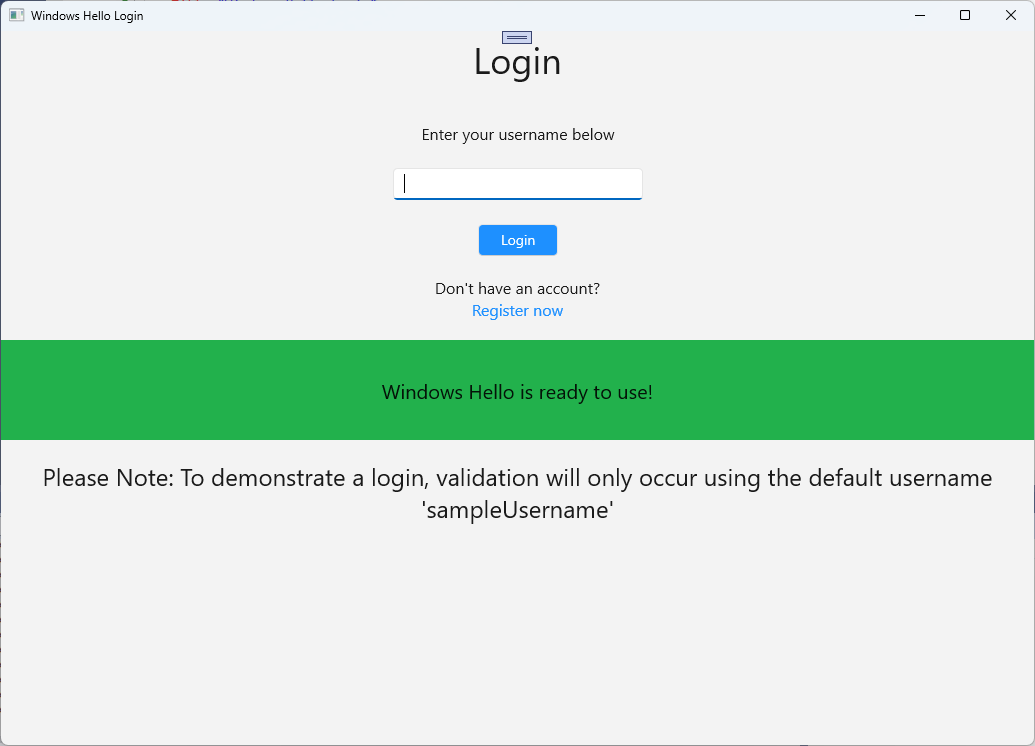
若要定义新登录页的用户界面,请添加以下 XAML。 此 XAML 定义一个
StackPanel对齐以下子级:将包含标题的 A
TextBlock。错误消息的 A
TextBlock。要输入的用户名的 A
TextBox。导航到注册页的 A
Button。一个包含 Windows Hello 状态的 A
TextBlock。说明登录页的 A
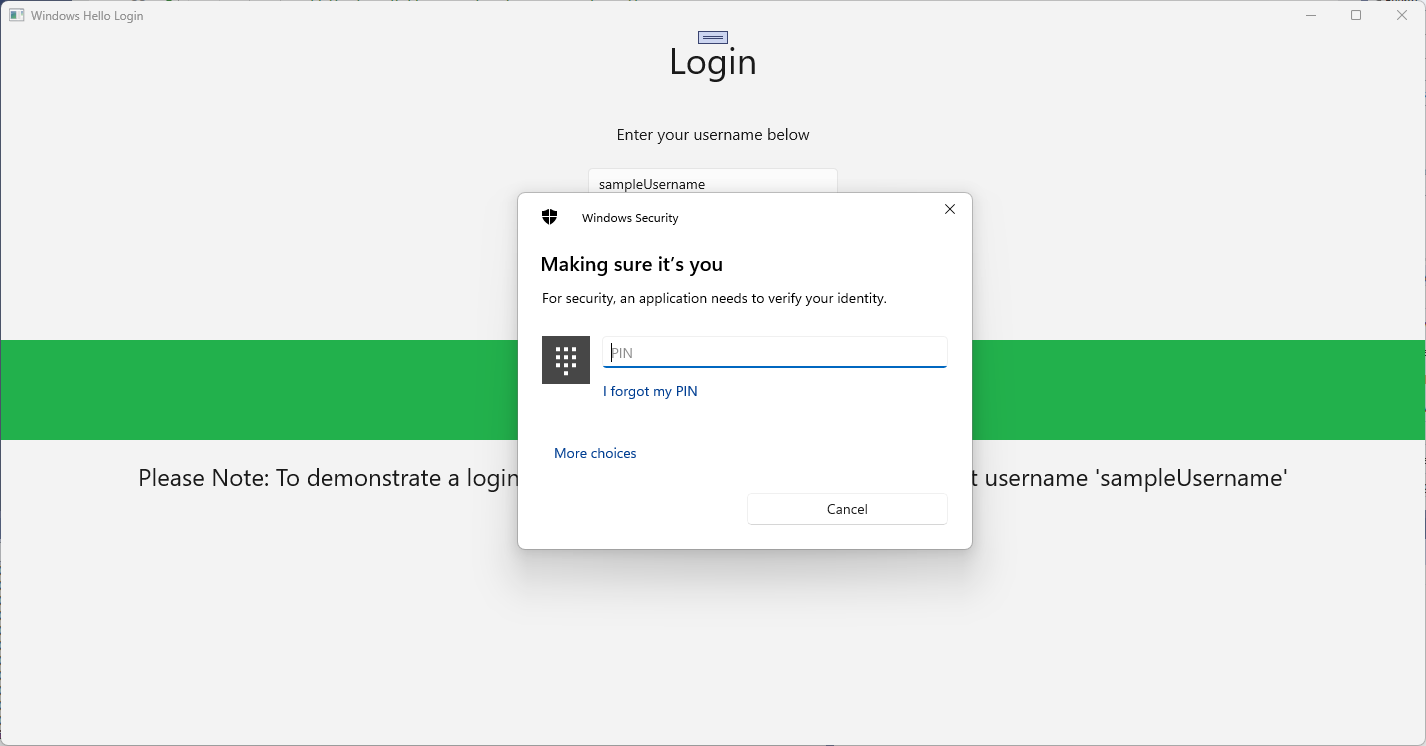
TextBlock,因为还没有后端或已配置的用户。<Grid> <StackPanel> <TextBlock Text="Login" FontSize="36" Margin="4" TextAlignment="Center"/> <TextBlock x:Name="ErrorMessage" Text="" FontSize="20" Margin="4" Foreground="Red" TextAlignment="Center"/> <TextBlock Text="Enter your username below" Margin="0,0,0,20" TextWrapping="Wrap" Width="300" TextAlignment="Center" VerticalAlignment="Center" FontSize="16"/> <TextBox x:Name="UsernameTextBox" Margin="4" Width="250"/> <Button x:Name="LoginButton" Content="Login" Background="DodgerBlue" Foreground="White" Click="LoginButton_Click" Width="80" HorizontalAlignment="Center" Margin="0,20"/> <TextBlock Text="Don't have an account?" TextAlignment="Center" VerticalAlignment="Center" FontSize="16"/> <TextBlock x:Name="RegisterButtonTextBlock" Text="Register now" PointerPressed="RegisterButtonTextBlock_OnPointerPressed" Foreground="DodgerBlue" TextAlignment="Center" VerticalAlignment="Center" FontSize="16"/> <Border x:Name="WindowsHelloStatus" Background="#22B14C" Margin="0,20" Height="100" > <TextBlock x:Name="WindowsHelloStatusText" Text="Windows Hello is ready to use!" Margin="4" TextAlignment="Center" VerticalAlignment="Center" FontSize="20"/> </Border> <TextBlock x:Name="LoginExplanation" FontSize="24" TextAlignment="Center" TextWrapping="Wrap" Text="Please Note: To demonstrate a login, validation will only occur using the default username 'sampleUsername'"/> </StackPanel> </Grid>
需要向代码隐藏文件添加一些方法来获取解决方案生成。 按 F7 或使用解决方案资源管理器编辑Login.xaml.cs文件。 添加以下两个事件方法来处理 登录 和 注册 事件。 目前,这些方法将设置为
ErrorMessage.Text空字符串。 请务必包含以下 using 语句。 后续步骤将需要它们。using Microsoft.UI.Xaml; using Microsoft.UI.Xaml.Controls; using Microsoft.UI.Xaml.Input; using Microsoft.UI.Xaml.Media; using Microsoft.UI.Xaml.Navigation; using System; namespace WindowsHelloLogin.Views { public sealed partial class Login : Page { public Login() { this.InitializeComponent(); } private void LoginButton_Click(object sender, RoutedEventArgs e) { ErrorMessage.Text = ""; } private void RegisterButtonTextBlock_OnPointerPressed(object sender, PointerRoutedEventArgs e) { ErrorMessage.Text = ""; } } }若要呈现登录页,请编辑 MainPage 代码,以便在加载 MainPage 时导航到登录页。 打开 MainPage.xaml.cs 文件。 在解决方案资源管理器中,双击MainPage.xaml.cs。 如果找不到此项,请单击 MainPage.xaml 旁边的小箭头以显示代码隐藏文件。 创建一个加载的事件处理程序方法,该方法将导航到登录页。
namespace WindowsHelloLogin.Views
{
    public sealed partial class MainPage : Page
    {
        public MainPage()
        {
            this.InitializeComponent();
            Loaded += MainPage_Loaded;
        }

        private void MainPage_Loaded(object sender, RoutedEventArgs e)
        {
            Frame.Navigate(typeof(Login));
        }
    }
}
在 “登录 ”页中,需要处理事件
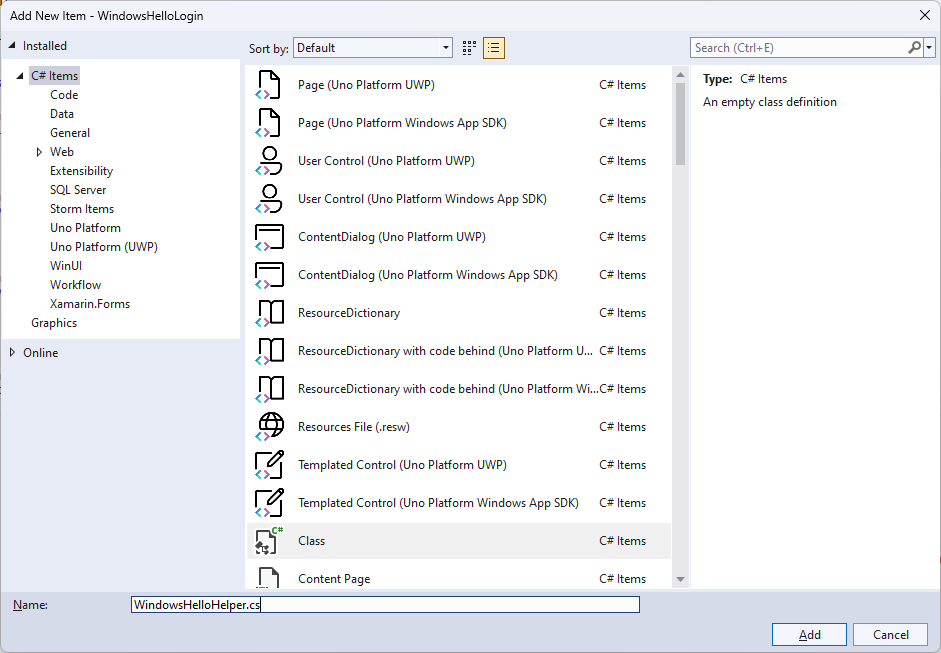
OnNavigatedTo,以验证当前计算机上是否提供 Windows Hello。 在Login.xaml.cs中,实现以下代码。 你会注意到 WindowsHelloHelper 对象指示存在错误。 这是因为我们尚未创建此帮助程序类。public sealed partial class Login : Page { public Login() { this.InitializeComponent(); } protected override async void OnNavigatedTo(NavigationEventArgs e) { // Check if Windows Hello is set up and available on this machine if (await WindowsHelloHelper.WindowsHelloAvailableCheckAsync()) { } else { // Windows Hello isn't set up, so inform the user WindowsHelloStatus.Background = new SolidColorBrush(Windows.UI.Color.FromArgb(255, 50, 170, 207)); WindowsHelloStatusText.Text = $"Windows Hello is not set up!{Environment.NewLine}Please go to Windows Settings and set up a PIN to use it."; LoginButton.IsEnabled = false; } } }若要创建 WindowsHelloHelper 类,请右键单击 WindowsHelloLogin 项目,然后单击“添加新>文件夹”。 将此文件夹 命名为 Utils。
右键单击 Utils 文件夹,然后选择“添加>类”。 将此新类命名为“WindowsHelloHelper.cs”。
将 WindowsHelloHelper 类的范围更改为
public static,然后添加以下方法,以通知用户是否准备好使用 Windows Hello。 需要添加所需的命名空间。using System; using System.Diagnostics; using System.Threading.Tasks; using Windows.Security.Credentials; namespace WindowsHelloLogin.Utils { public static class WindowsHelloHelper { /// <summary> /// Checks to see if Windows Hello is ready to be used. /// /// Windows Hello has dependencies on: /// 1. Having a connected Microsoft Account /// 2. Having a Windows PIN set up for that account on the local machine /// </summary> public static async Task<bool> WindowsHelloAvailableCheckAsync() { bool keyCredentialAvailable = await KeyCredentialManager.IsSupportedAsync(); if (keyCredentialAvailable == false) { // Key credential is not enabled yet as user // needs to connect to a Microsoft Account and select a PIN in the connecting flow. Debug.WriteLine("Windows Hello is not set up!\nPlease go to Windows Settings and set up a PIN to use it."); return false; } return true; } } }在Login.xaml.cs中,添加对命名空间的
WindowsHelloLogin.Utils引用。 这将解决方法中的OnNavigatedTo错误。using WindowsHelloLogin.Utils;生成并运行应用程序。 你将导航到登录页,Windows Hello 横幅将指示你是否准备好使用 Windows Hello。 应会看到指示计算机上的 Windows Hello 状态的绿色或蓝色横幅。
接下来需要做的是生成用于登录的逻辑。 在名为“Models”的项目中创建一个新文件夹。
在 Models 文件夹中,创建名为“Account.cs”的新类。 此类将充当帐户模型。 由于这是一个示例项目,它只包含用户名。 将类范围更改为
public并添加Username属性。namespace WindowsHelloLogin.Models { public class Account { public string Username { get; set; } } }应用需要一种方法来处理帐户。 对于此动手实验室,由于没有服务器或数据库,因此会在本地保存并加载用户列表。 右键单击 Utils 文件夹并添加名为“AccountHelper.cs”的新类。 将类范围更改为
public static. AccountHelper 是一个静态类,其中包含在本地保存和加载帐户列表所需的所有方法。 使用 XmlSerializer 保存和加载工作。 还需要记住已保存的文件及其保存位置。using System; using System.Collections.Generic; using System.IO; using System.Text; using System.Threading.Tasks; using System.Xml.Serialization; using Windows.Storage; using WindowsHelloLogin.Models; namespace WindowsHelloLogin.Utils { public static class AccountHelper { // In the real world this would not be needed as there would be a server implemented that would host a user account database. // For this tutorial we will just be storing accounts locally. private const string USER_ACCOUNT_LIST_FILE_NAME = "accountlist.txt"; private static string _accountListPath = Path.Combine(ApplicationData.Current.LocalFolder.Path, USER_ACCOUNT_LIST_FILE_NAME); public static List<Account> AccountList = []; /// <summary> /// Create and save a useraccount list file. (Updating the old one) /// </summary> private static async void SaveAccountListAsync() { string accountsXml = SerializeAccountListToXml(); if (File.Exists(_accountListPath)) { StorageFile accountsFile = await StorageFile.GetFileFromPathAsync(_accountListPath); await FileIO.WriteTextAsync(accountsFile, accountsXml); } else { StorageFile accountsFile = await ApplicationData.Current.LocalFolder.CreateFileAsync(USER_ACCOUNT_LIST_FILE_NAME); await FileIO.WriteTextAsync(accountsFile, accountsXml); } } /// <summary> /// Gets the useraccount list file and deserializes it from XML to a list of useraccount objects. /// </summary> /// <returns>List of useraccount objects</returns> public static async Task<List<Account>> LoadAccountListAsync() { if (File.Exists(_accountListPath)) { StorageFile accountsFile = await StorageFile.GetFileFromPathAsync(_accountListPath); string accountsXml = await FileIO.ReadTextAsync(accountsFile); DeserializeXmlToAccountList(accountsXml); } return AccountList; } /// <summary> /// Uses the local list of accounts and returns an XML formatted string representing the list /// </summary> /// <returns>XML formatted list of accounts</returns> public static string SerializeAccountListToXml() { var xmlizer = new XmlSerializer(typeof(List<Account>)); var writer = new StringWriter(); xmlizer.Serialize(writer, AccountList); return writer.ToString(); } /// <summary> /// Takes an XML formatted string representing a list of accounts and returns a list object of accounts /// </summary> /// <param name="listAsXml">XML formatted list of accounts</param> /// <returns>List object of accounts</returns> public static List<Account> DeserializeXmlToAccountList(string listAsXml) { var xmlizer = new XmlSerializer(typeof(List<Account>)); TextReader textreader = new StreamReader(new MemoryStream(Encoding.UTF8.GetBytes(listAsXml))); return AccountList = (xmlizer.Deserialize(textreader)) as List<Account>; } } }接下来,实现从本地帐户列表中添加和删除帐户的方法。 这些操作将分别保存列表。 此动手实验室需要的最后一种方法是验证方法。 由于没有授权服务器或用户的数据库,这将针对硬编码的单个用户进行验证。 这些方法应添加到 AccountHelper 类。
public static Account AddAccount(string username)
{
    // Create a new account with the username
    var account = new Account() { Username = username };
    // Add it to the local list of accounts
    AccountList.Add(account);
    // SaveAccountList and return the account
    SaveAccountListAsync();
    return account;
}

public static void RemoveAccount(Account account)
{
    // Remove the account from the accounts list
    AccountList.Remove(account);
    // Re save the updated list
    SaveAccountListAsync();
}

public static bool ValidateAccountCredentials(string username)
{
    // In the real world, this method would call the server to authenticate that the account exists and is valid.
    // However, for this tutorial, we'll just have an existing sample user that's named "sampleUsername".
    // If the username is null or does not match "sampleUsername" validation will fail.
    // In this case, the user should register a new Windows Hello user.

    if (string.IsNullOrEmpty(username))
    {
        return false;
    }

    if (!string.Equals(username, "sampleUsername"))
    {
        return false;
    }

    return true;
}
接下来需要做的是处理来自用户的登录请求。 在Login.xaml.cs中,创建一个新的私有变量,用于保存当前帐户登录。 然后添加名为 SignInWindowsHelloAsync 的新方法。 这将使用 AccountHelper.ValidateAccountCredentials 方法验证帐户凭据。 如果输入的用户名与上一 步中配置的硬编码字符串值相同,此方法将返回布尔 值。 此示例的硬编码值为“sampleUsername”。
using WindowsHelloLogin.Models;
using WindowsHelloLogin.Utils;
using System.Diagnostics;
using System.Threading.Tasks;

namespace WindowsHelloLogin.Views
{
    public sealed partial class Login : Page
    {
        private Account _account;

        public Login()
        {
            this.InitializeComponent();
        }

        protected override async void OnNavigatedTo(NavigationEventArgs e)
        {
            // Check if Windows Hello is set up and available on this machine
            if (await WindowsHelloHelper.WindowsHelloAvailableCheckAsync())
            {
            }
            else
            {
                // Windows Hello is not set up, so inform the user
                WindowsHelloStatus.Background = new SolidColorBrush(Windows.UI.Color.FromArgb(255, 50, 170, 207));
                WindowsHelloStatusText.Text = "Windows Hello is not set up!\nPlease go to Windows Settings and set up a PIN to use it.";
                LoginButton.IsEnabled = false;
            }
        }

        private async void LoginButton_Click(object sender, RoutedEventArgs e)
        {
            ErrorMessage.Text = "";
            await SignInWindowsHelloAsync();
        }

        private void RegisterButtonTextBlock_OnPointerPressed(object sender, PointerRoutedEventArgs e)
        {
            ErrorMessage.Text = "";
        }

        private async Task SignInWindowsHelloAsync()
        {
            if (AccountHelper.ValidateAccountCredentials(UsernameTextBox.Text))
            {
                // Create and add a new local account
                _account = AccountHelper.AddAccount(UsernameTextBox.Text);
                Debug.WriteLine("Successfully signed in with traditional credentials and created local account instance!");

                //if (await WindowsHelloHelper.CreateWindowsHelloKeyAsync(UsernameTextBox.Text))
                //{
                //    Debug.WriteLine("Successfully signed in with Windows Hello!");
                //}
            }
            else
            {
                ErrorMessage.Text = "Invalid Credentials";
            }
        }
    }
}
你可能已注意到在 WindowsHelloHelper 中引用方法的注释代码。 在WindowsHelloHelper.cs中,添加名为 CreateWindowsHelloKeyAsync 的新方法。 此方法在 KeyCredentialManager 中使用 Windows Hello API。 调用 RequestCreateAsync 将创建特定于 accountId 和本地计算机的 Windows Hello 密钥。 如果有兴趣在实际方案中实现此情况,请注意 switch 语句中的注释。
/// <summary>
/// Creates a Windows Hello key on the machine using the account ID provided.
/// </summary>
/// <param name="accountId">The account ID associated with the account that we are enrolling into Windows Hello</param>
/// <returns>Boolean indicating if creating the Windows Hello key succeeded</returns>
public static async Task<bool> CreateWindowsHelloKeyAsync(string accountId)
{
    KeyCredentialRetrievalResult keyCreationResult = await KeyCredentialManager.RequestCreateAsync(accountId, KeyCredentialCreationOption.ReplaceExisting);

    switch (keyCreationResult.Status)
    {
        case KeyCredentialStatus.Success:
            Debug.WriteLine("Successfully created key");

            // In the real world, authentication would take place on a server.
            // So, every time a user migrates or creates a new Windows Hello
            // account, details should be pushed to the server.
            // The details that would be pushed to the server include:
            // The public key, keyAttestation (if available),
            // certificate chain for attestation endorsement key (if available),
            // status code of key attestation result: keyAttestationIncluded or
            // keyAttestationCanBeRetrievedLater and keyAttestationRetryType.
            // As this sample has no concept of a server, it will be skipped for now.
            // For information on how to do this, refer to the second sample.

            // For this sample, just return true
            return true;
        case KeyCredentialStatus.UserCanceled:
            Debug.WriteLine("User cancelled sign-in process.");
            break;
        case KeyCredentialStatus.NotFound:
            // User needs to set up Windows Hello
            Debug.WriteLine("Windows Hello is not set up!\nPlease go to Windows Settings and set up a PIN to use it.");
            break;
        default:
            break;
    }

    return false;
}
创建 CreateWindowsHelloKeyAsync 方法后,返回到Login.xaml.cs文件并取消注释 SignInWindowsHelloAsync 方法中的代码。
private async void SignInWindowsHelloAsync()
{
    if (AccountHelper.ValidateAccountCredentials(UsernameTextBox.Text))
    {
        //Create and add a new local account
        _account = AccountHelper.AddAccount(UsernameTextBox.Text);
        Debug.WriteLine("Successfully signed in with traditional credentials and created local account instance!");

        if (await WindowsHelloHelper.CreateWindowsHelloKeyAsync(UsernameTextBox.Text))
        {
            Debug.WriteLine("Successfully signed in with Windows Hello!");
        }
    }
    else
    {
        ErrorMessage.Text = "Invalid Credentials";
    }
}
生成并运行应用程序。 你将进入“登录”页。 输入用户名为“sampleUsername”,然后单击登录名。 系统会提示你输入 PIN 的 Windows Hello 提示符。 正确输入 PIN 后, CreateWindowsHelloKeyAsync 方法将能够创建 Windows Hello 密钥。 监视输出窗口,查看指示成功的消息是否显示。
练习 2:欢迎页面和用户选择页
在本练习中,你将继续执行上一练习。 当用户成功登录时,应将其带到欢迎页面,以便注销或删除其帐户。 当 Windows Hello 为每个计算机创建密钥时,可以创建用户选择屏幕,该屏幕显示已在该计算机上登录的所有用户。 然后,用户可以选择其中一个帐户,并直接转到欢迎屏幕,而无需重新输入密码,因为他们已经进行身份验证以访问计算机。
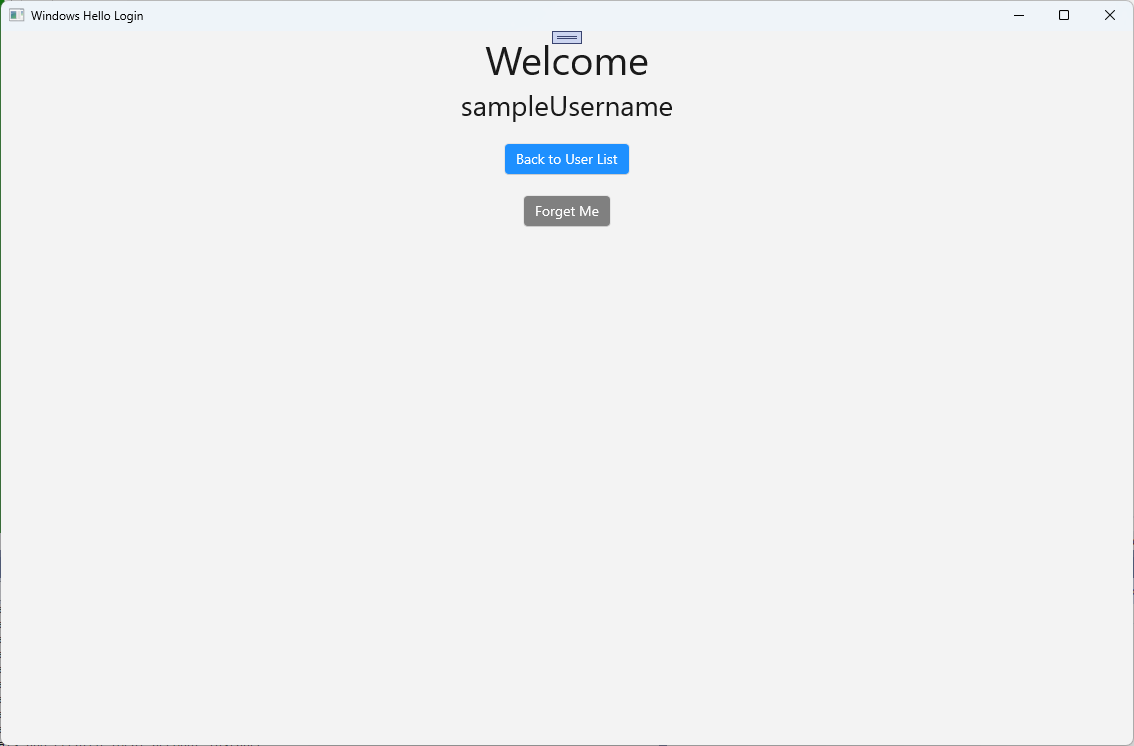
在 “视图 ”文件夹中,添加名为“Welcome.xaml”的新空白页。 添加以下 XAML 以完成页面的用户界面。 这将显示标题、登录的用户名和两个按钮。 其中一个按钮将导航回用户列表(稍后将创建该列表),另一个按钮将处理忘记此用户。
<Grid>
  <StackPanel>
    <TextBlock x:Name="Title" Text="Welcome" FontSize="40" TextAlignment="Center"/>
    <TextBlock x:Name="UserNameText" FontSize="28" TextAlignment="Center"/>

    <Button x:Name="BackToUserListButton" Content="Back to User List" Click="Button_Restart_Click"
            HorizontalAlignment="Center" Margin="0,20" Foreground="White" Background="DodgerBlue"/>

    <Button x:Name="ForgetButton" Content="Forget Me" Click="Button_Forget_User_Click"
            Foreground="White"
            Background="Gray"
            HorizontalAlignment="Center"/>
  </StackPanel>
</Grid>
在Welcome.xaml.cs代码隐藏文件中,添加一个新的私有变量,用于保存已登录的帐户。 需要实现替代事件的方法
OnNavigateTo,这将存储传递给欢迎页的帐户。 还需要为 XAML 中定义的两个按钮实现Click事件。 需要为命名空间WindowsHelloLogin.Utils添加 using 语句WindowsHelloLogin.Models。using WindowsHelloLogin.Models; using WindowsHelloLogin.Utils; using System.Diagnostics; namespace WindowsHelloLogin.Views { public sealed partial class Welcome : Page { private Account _activeAccount; public Welcome() { InitializeComponent(); } protected override void OnNavigatedTo(NavigationEventArgs e) { _activeAccount = (Account)e.Parameter; if (_activeAccount != null) { UserNameText.Text = _activeAccount.Username; } } private void Button_Restart_Click(object sender, RoutedEventArgs e) { } private void Button_Forget_User_Click(object sender, RoutedEventArgs e) { // Remove the account from Windows Hello // WindowsHelloHelper.RemoveWindowsHelloAccountAsync(_activeAccount); // Remove it from the local accounts list and re-save the updated list AccountHelper.RemoveAccount(_activeAccount); Debug.WriteLine($"User {_activeAccount.Username} deleted."); } } }你可能注意到事件处理程序中
Button_Forget_User_Click已行注释。 帐户正在从本地列表中删除,但当前无法从 Windows Hello 中删除。 你需要在WindowsHelloHelper.cs中实现一个新方法,该方法将处理删除 Windows Hello 用户。 此方法将使用其他 Windows Hello API 打开和删除帐户。 在现实世界中,删除帐户时,应通知服务器或数据库,以便用户数据库保持有效。 需要引用命名空间的WindowsHelloLogin.Modelsusing 语句。using WindowsHelloLogin.Models; /// <summary> /// Function to be called when user requests deleting their account. /// Checks the KeyCredentialManager to see if there is a Windows Hello /// account for the current user. /// It then deletes the local key associated with the account. /// </summary> public static async void RemoveWindowsHelloAccountAsync(Account account) { // Open the account with Windows Hello KeyCredentialRetrievalResult keyOpenResult = await KeyCredentialManager.OpenAsync(account.Username); if (keyOpenResult.Status == KeyCredentialStatus.Success) { // In the real world you would send key information to server to unregister //for example, RemoveWindowsHelloAccountOnServer(account); } // Then delete the account from the machine's list of Windows Hello accounts await KeyCredentialManager.DeleteAsync(account.Username); }返回Welcome.xaml.cs,取消注释调用 RemoveWindowsHelloAccountAsync 的行。
private void Button_Forget_User_Click(object sender, RoutedEventArgs e)
{
    // Remove it from Windows Hello
    WindowsHelloHelper.RemoveWindowsHelloAccountAsync(_activeAccount);

    // Remove it from the local accounts list and re-save the updated list
    AccountHelper.RemoveAccount(_activeAccount);

    Debug.WriteLine($"User {_activeAccount.Username} deleted.");
}
在 SignInWindowsHelloAsync 方法(Login.xaml.cs中),CreateWindowsHelloKeyAsync 成功后,它应导航到欢迎页并传递帐户。
private async void SignInWindowsHelloAsync()
{
    if (AccountHelper.ValidateAccountCredentials(UsernameTextBox.Text))
    {
        // Create and add a new local account
        _account = AccountHelper.AddAccount(UsernameTextBox.Text);
        Debug.WriteLine("Successfully signed in with traditional credentials and created local account instance!");

        if (await WindowsHelloHelper.CreateWindowsHelloKeyAsync(UsernameTextBox.Text))
        {
            Debug.WriteLine("Successfully signed in with Windows Hello!");
            Frame.Navigate(typeof(Welcome), _account);
        }
    }
    else
    {
        ErrorMessage.Text = "Invalid Credentials";
    }
}
生成并运行应用程序。 使用“sampleUsername”登录,然后单击“ 登录”。 输入 PIN,如果成功,应导航到 欢迎 屏幕。 尝试单击“忘记用户”并监视 Visual Studio 的“输出”窗口,以查看用户是否已删除。 请注意,删除用户后,仍保留在 “欢迎 ”页面上。 需要创建应用可以导航到的用户选择页面。
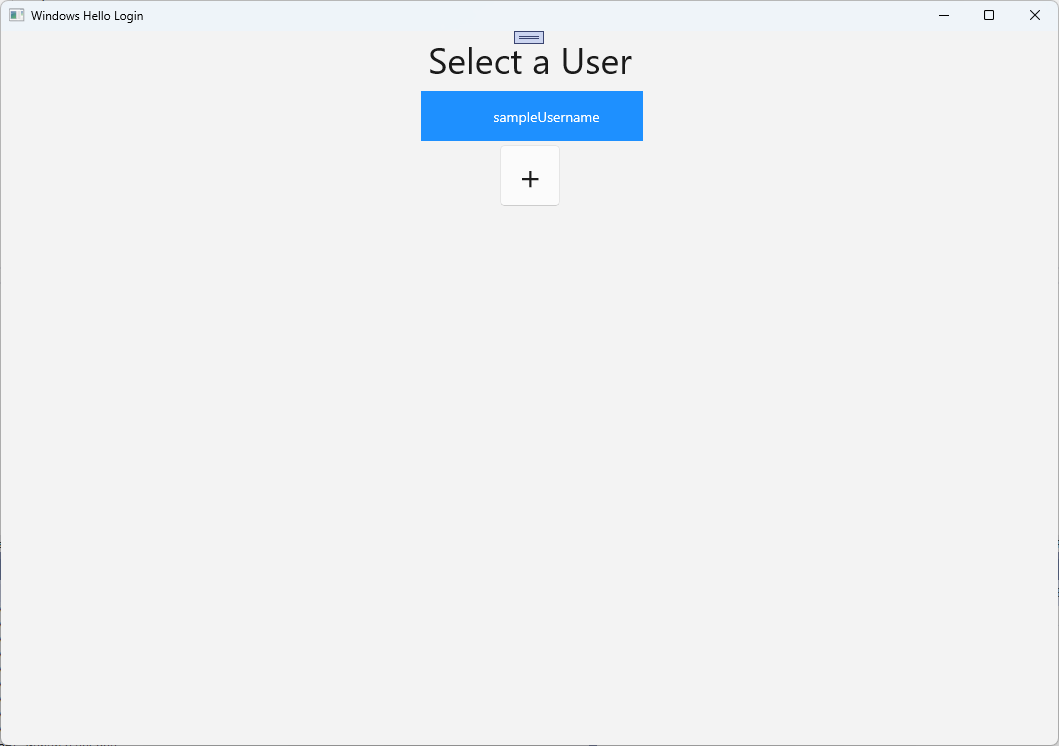
在 Views 文件夹中,创建名为“UserSelection.xaml”的新空白页,并添加以下 XAML 来定义用户界面。 此页面将包含一个 ListView ,该列表显示本地帐户列表中的所有用户,该
Button列表将导航到 登录 页以允许用户添加另一个帐户。<Grid> <StackPanel> <TextBlock x:Name="Title" Text="Select a User" FontSize="36" Margin="4" TextAlignment="Center" HorizontalAlignment="Center"/> <ListView x:Name="UserListView" Margin="4" MaxHeight="200" MinWidth="250" Width="250" HorizontalAlignment="Center"> <ListView.ItemTemplate> <DataTemplate> <Grid Background="DodgerBlue" Height="50" Width="250" HorizontalAlignment="Stretch" VerticalAlignment="Stretch"> <TextBlock Text="{Binding Username}" HorizontalAlignment="Center" TextAlignment="Center" VerticalAlignment="Center" Foreground="White"/> </Grid> </DataTemplate> </ListView.ItemTemplate> </ListView> <Button x:Name="AddUserButton" Content="+" FontSize="36" Width="60" Click="AddUserButton_Click" HorizontalAlignment="Center"/> </StackPanel> </Grid>在UserSelection.xaml.cs中,实现
Loaded将导航到 登录 页的方法(如果本地列表中没有帐户)。 同时为ListView该SelectionChanged事件实现事件和Click事件Button。using System.Diagnostics; using WindowsHelloLogin.Models; using WindowsHelloLogin.Utils; namespace WindowsHelloLogin.Views { public sealed partial class UserSelection : Page { public UserSelection() { InitializeComponent(); Loaded += UserSelection_Loaded; } private void UserSelection_Loaded(object sender, RoutedEventArgs e) { if (AccountHelper.AccountList.Count == 0) { // If there are no accounts, navigate to the Login page Frame.Navigate(typeof(Login)); } UserListView.ItemsSource = AccountHelper.AccountList; UserListView.SelectionChanged += UserSelectionChanged; } /// <summary> /// Function called when an account is selected in the list of accounts /// Navigates to the Login page and passes the chosen account /// </summary> private void UserSelectionChanged(object sender, RoutedEventArgs e) { if (((ListView)sender).SelectedValue != null) { Account account = (Account)((ListView)sender).SelectedValue; if (account != null) { Debug.WriteLine($"Account {account.Username} selected!"); } Frame.Navigate(typeof(Login), account); } } /// <summary> /// Function called when the "+" button is clicked to add a new user. /// Navigates to the Login page with nothing filled out /// </summary> private void AddUserButton_Click(object sender, RoutedEventArgs e) { Frame.Navigate(typeof(Login)); } } }应用中有几个地方需要导航到 UserSelection 页面。 在MainPage.xaml.cs中,应导航到 UserSelection 页面,而不是“登录”页。 在 MainPage 中加载事件时,需要加载帐户列表,以便 UserSelection 页面可以检查是否有任何帐户。 这需要将方法更改为
Loaded异步,并添加命名空间的WindowsHelloLogin.Utilsusing 语句。using WindowsHelloLogin.Utils; private async void MainPage_Loaded(object sender, RoutedEventArgs e) { // Load the local account list before navigating to the UserSelection page await AccountHelper.LoadAccountListAsync(); Frame.Navigate(typeof(UserSelection)); }接下来,应用需要从“欢迎”页导航到 UserSelection 页面。 在这两
Click个事件中,应导航回 UserSelection 页面。private void Button_Restart_Click(object sender, RoutedEventArgs e) { Frame.Navigate(typeof(UserSelection)); } private void Button_Forget_User_Click(object sender, RoutedEventArgs e) { // Remove it from Windows Hello WindowsHelloHelper.RemoveWindowsHelloAccountAsync(_activeAccount); // Remove it from the local accounts list and re-save the updated list AccountHelper.RemoveAccount(_activeAccount); Debug.WriteLine($"User {_activeAccount.Username} deleted."); // Navigate back to UserSelection page. Frame.Navigate(typeof(UserSelection)); }在“登录”页中,需要代码登录到从 UserSelection 页的列表中选择的帐户。 在这种情况下
OnNavigatedTo,存储导航期间传递的帐户。 首先,添加一个新的专用变量,用于标识该帐户是否为现有帐户。 然后处理事件OnNavigatedTo。namespace WindowsHelloLogin.Views { public sealed partial class Login : Page { private Account _account; private bool _isExistingAccount; public Login() { InitializeComponent(); } /// <summary> /// Function called when this frame is navigated to. /// Checks to see if Windows Hello is available and if an account was passed in. /// If an account was passed in set the "_isExistingAccount" flag to true and set the _account. /// </summary> protected override async void OnNavigatedTo(NavigationEventArgs e) { // Check Windows Hello is set up and available on this machine if (await WindowsHelloHelper.WindowsHelloAvailableCheckAsync()) { if (e.Parameter != null) { _isExistingAccount = true; // Set the account to the existing account being passed in _account = (Account)e.Parameter; UsernameTextBox.Text = _account.Username; await SignInWindowsHelloAsync(); } } else { // Windows Hello is not set up, so inform the user WindowsHelloStatus.Background = new SolidColorBrush(Windows.UI.Color.FromArgb(255, 50, 170, 207)); WindowsHelloStatusText.Text = $"Windows Hello is not set up!{Environment.NewLine}Please go to Windows Settings and set up a PIN to use it."; LoginButton.IsEnabled = false; } } } }需要更新 SignInWindowsHelloAsync 方法才能登录到所选帐户。 WindowsHelloHelper 需要另一种方法才能使用 Windows Hello 打开帐户,因为该帐户已为其创建了帐户密钥。 在 WindowsHelloHelper.cs 中实现新方法,以使用 Windows Hello 登录现有用户。 有关代码的每个部分的信息,请阅读代码注释。
/// <summary>
/// Attempts to sign a message using the account key on the system for the accountId passed.
/// </summary>
/// <returns>Boolean representing if creating the Windows Hello authentication message succeeded</returns>
public static async Task<bool> GetWindowsHelloAuthenticationMessageAsync(Account account)
{
    KeyCredentialRetrievalResult openKeyResult = await KeyCredentialManager.OpenAsync(account.Username);
    // Calling OpenAsync will allow the user access to what is available in the app and will not require user credentials again.
    // If you wanted to force the user to sign in again you can use the following:
    // var consentResult = await Windows.Security.Credentials.UI.UserConsentVerifier.RequestVerificationAsync(account.Username);
    // This will ask for the either the password of the currently signed in Microsoft Account or the PIN used for Windows Hello.

    if (openKeyResult.Status == KeyCredentialStatus.Success)
    {
        // If OpenAsync has succeeded, the next thing to think about is whether the client application requires access to backend services.
        // If it does here you would request a challenge from the server. The client would sign this challenge and the server
        // would check the signed challenge. If it is correct, it would allow the user access to the backend.
        // You would likely make a new method called RequestSignAsync to handle all this.
        // For example, RequestSignAsync(openKeyResult);
        // Refer to the second Windows Hello sample for information on how to do this.

        // For this sample, there is not concept of a server implemented so just return true.
        return true;
    }
    else if (openKeyResult.Status == KeyCredentialStatus.NotFound)
    {
        // If the account is not found at this stage. It could be one of two errors.
        // 1. Windows Hello has been disabled
        // 2. Windows Hello has been disabled and re-enabled cause the Windows Hello Key to change.
        // Calling CreateWindowsHelloKeyAsync and passing through the account will attempt to replace the existing Windows Hello Key for that account.
        // If the error really is that Windows Hello is disabled then the CreateWindowsHelloKeyAsync method will output that error.
        if (await CreateWindowsHelloKeyAsync(account.Username))
        {
            // If the Hello Key was again successfully created, Windows Hello has just been reset.
            // Now that the Hello Key has been reset for the account retry sign in.
            return await GetWindowsHelloAuthenticationMessageAsync(account);
        }
    }

    // Can't use Windows Hello right now, try again later
    return false;
}
更新 Login.xaml.cs中的 SignInWindowsHelloAsync 方法以处理现有帐户。 这将使用WindowsHelloHelper.cs中的新方法。 如果成功,帐户将登录,并且用户导航到“ 欢迎 ”页。
private async Task SignInWindowsHelloAsync()
{
    if (_isExistingAccount)
    {
        if (await WindowsHelloHelper.GetWindowsHelloAuthenticationMessageAsync(_account))
        {
            Frame.Navigate(typeof(Welcome), _account);
        }
    }
    else if (AccountHelper.ValidateAccountCredentials(UsernameTextBox.Text))
    {
        //Create and add a new local account
        _account = AccountHelper.AddAccount(UsernameTextBox.Text);
        Debug.WriteLine("Successfully signed in with traditional credentials and created local account instance!");

        if (await WindowsHelloHelper.CreateWindowsHelloKeyAsync(UsernameTextBox.Text))
        {
            Debug.WriteLine("Successfully signed in with Windows Hello!");
            Frame.Navigate(typeof(Welcome), _account);
        }
    }
    else
    {
        ErrorMessage.Text = "Invalid Credentials";
    }
}
生成并运行应用程序。 使用“sampleUsername”登录。 键入 PIN,如果成功,将导航到 “欢迎 ”页。 单击回用户列表。 现在应该会在列表中看到用户。 如果单击此项,WindowsHello 允许你重新登录,而无需重新输入任何密码等。
练习 3:注册新的 Windows Hello 用户
在本练习中,你将创建一个新页面,该页面可以使用 Windows Hello 创建新帐户。 这与 登录 页的工作方式类似。 “ 登录 ”页是为迁移到使用 Windows Hello 的现有用户实现的。 WindowsHelloRegister 页面将为新用户创建 Windows Hello 注册。
在 Views 文件夹中,创建名为“WindowsHelloRegister.xaml”的新空白页。 在 XAML 中添加以下内容以设置用户界面。 此页上的接口类似于 登录 页。
<Grid>
  <StackPanel>
    <TextBlock x:Name="Title" Text="Register New Windows Hello User" FontSize="24" Margin="4" TextAlignment="Center"/>

    <TextBlock x:Name="ErrorMessage" Text="" FontSize="20" Margin="4" Foreground="Red" TextAlignment="Center"/>

    <TextBlock Text="Enter your new username below" Margin="0,0,0,20"
               TextWrapping="Wrap" Width="300"
               TextAlignment="Center" VerticalAlignment="Center" FontSize="16"/>

    <TextBox x:Name="UsernameTextBox" Margin="4" Width="250"/>

    <Button x:Name="RegisterButton" Content="Register" Background="DodgerBlue" Foreground="White"
            Click="RegisterButton_Click_Async" Width="80" HorizontalAlignment="Center" Margin="0,20"/>

    <Border x:Name="WindowsHelloStatus" Background="#22B14C" Margin="4" Height="100">
      <TextBlock x:Name="WindowsHelloStatusText" Text="Windows Hello is ready to use!" FontSize="20"
                 Margin="4" TextAlignment="Center" VerticalAlignment="Center"/>
    </Border>
  </StackPanel>
</Grid>
在WindowsHelloRegister.xaml.cs代码隐藏文件中,实现注册按钮的私有
Account变量和Click事件。 这将添加新的本地帐户并创建 Windows Hello 密钥。using Microsoft.UI.Xaml.Controls; using Microsoft.UI.Xaml; using WindowsHelloLogin.Models; using WindowsHelloLogin.Utils; namespace WindowsHelloLogin.Views { public sealed partial class WindowsHelloRegister : Page { private Account _account; public WindowsHelloRegister() { InitializeComponent(); } private async void RegisterButton_Click_Async(object sender, RoutedEventArgs e) { ErrorMessage.Text = ""; // In the real world, you would validate the entered credentials and information before // allowing a user to register a new account. // For this sample, we'll skip that step and just register an account if the username is not null. if (!string.IsNullOrEmpty(UsernameTextBox.Text)) { // Register a new account _account = AccountHelper.AddAccount(UsernameTextBox.Text); // Register new account with Windows Hello await WindowsHelloHelper.CreateWindowsHelloKeyAsync(_account.Username); // Navigate to the Welcome page. Frame.Navigate(typeof(Welcome), _account); } else { ErrorMessage.Text = "Please enter a username"; } } } }单击注册时,需要从 登录 页导航到此页面。
private void RegisterButtonTextBlock_OnPointerPressed(object sender, PointerRoutedEventArgs e)
{
    ErrorMessage.Text = "";
    Frame.Navigate(typeof(WindowsHelloRegister));
}
生成并运行应用程序。 尝试注册新用户。 然后返回到用户列表并验证是否可以选择该用户和登录名。

在本实验室中,你了解了使用新 Windows Hello API 对现有用户进行身份验证和为新用户创建帐户所需的基本技能。 有了这一新知识,就可以开始删除用户记住应用程序密码的需求,但仍确信应用程序仍受用户身份验证保护。 Windows 使用 Windows Hello 的新身份验证技术来支持其生物识别登录选项。
