Add Azure IoT Hub source to an eventstream
This article shows you how to add an Azure IoT Hub source to an eventstream.
Note
If you want to use enhanced capabilities that are in preview, select Enhanced Capabilities at the top. Otherwise, select Standard Capabilities. For information about enhanced capabilities that are in preview, see Introduction to Fabric event streams.
Prerequisites
Before you start, you must complete the following prerequisites:
- Get access to a premium workspace with Contributor or above permissions where your eventstream is located.
- You need to have appropriate permission to get IoT hub's access keys. The IoT hub must be publicly accessible and not behind a firewall or secured in a virtual network.
Important
Enhanced capabilities of Fabric event streams are currently in preview.
Note
The maximum number of sources and destinations for one eventstream is 11.
Add Azure IoT Hub as a source
Follow these steps to add an Azure IoT hub as your eventstream source:
Create an eventstream with enhanced capabilities.
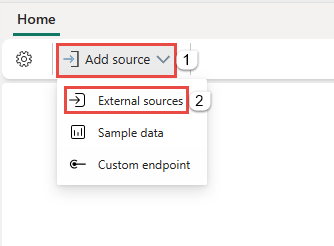
If you haven't added any source to your eventstream yet, select Add external source on the Get started page.

If you're adding an Azure IoT hub as a source to an already published eventstream, switch to Edit mode, select Add source on the ribbon, and then select External sources.
Configure Azure IoT Hub connector
On the Select a data source page, select Azure IoT Hub.

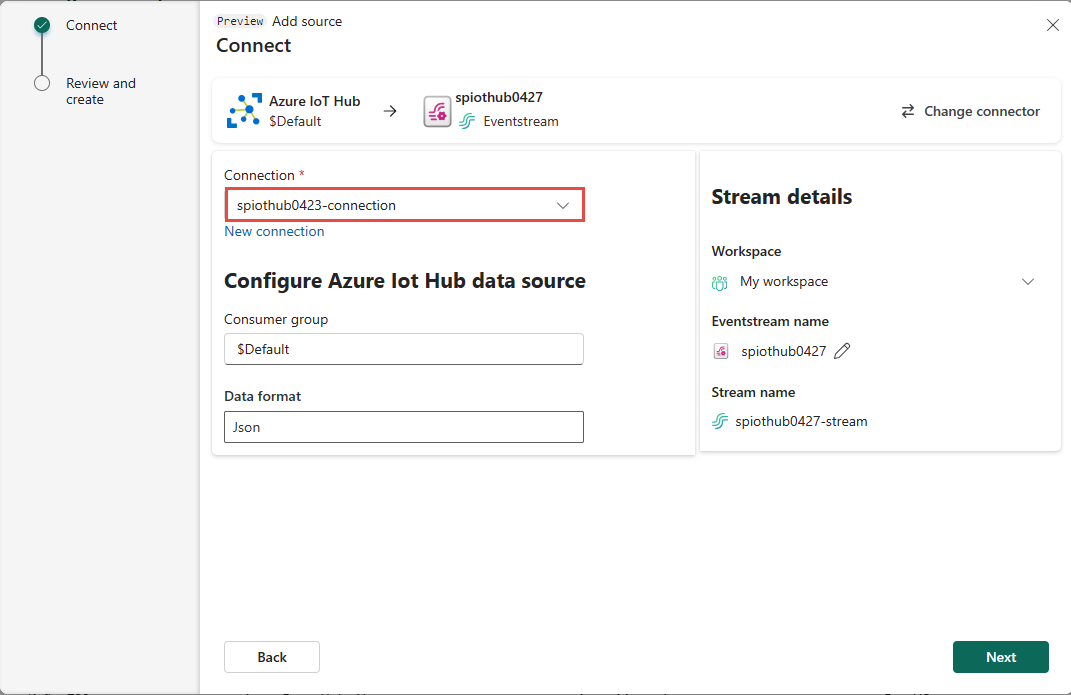
If there's an existing connection to your Azure IoT hub, select that existing connection as shown in the following image, and then move on to the step to configure Data format in the following steps.
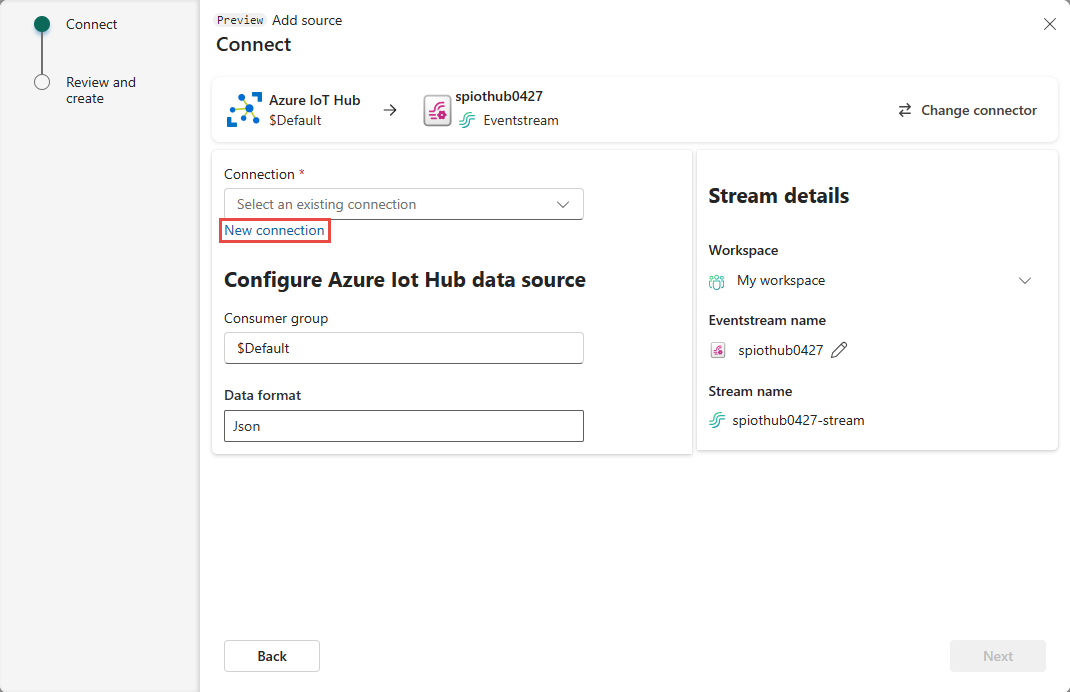
On the Connect page, select New connection.
In the Connection settings section, for IoT Hub, specify the name of your Azure IoT hub.
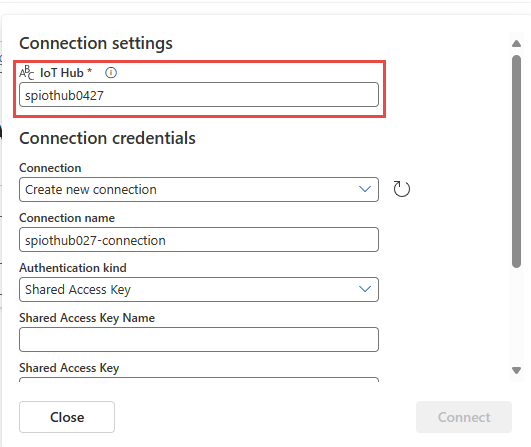
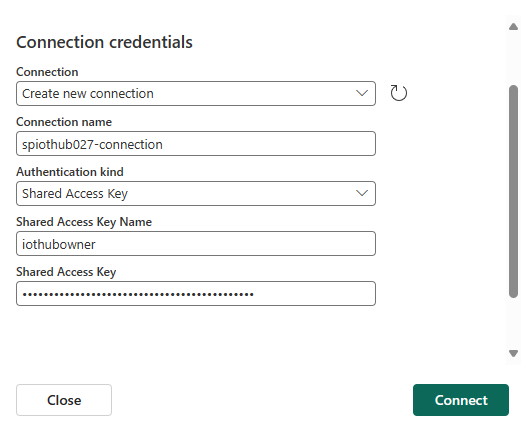
In the Connection credentials section, do these steps:
If there's an existing connection, select it from the drop-down list. If not, confirm that Create new connection is selected for this option.
For Connection name, enter a name for the connection to the IoT hub.
For Authentication method, confirm that Shared Access Key is selected.
For Shared Access Key Name, enter the name of the shared access key.
For Shared Access Key, enter the value of the shared access key.
Select Connect at the bottom of the page.1.
To get the access key name and value, follow these steps:
Navigate to the IoT Hub page for your Azure IoT hub in the Azure portal.
On the IoT Hub page, select Shared access policies on the left navigation menu.
Select a policy name from the list. Note down the policy name.
Select the copy button next to the Primary key.

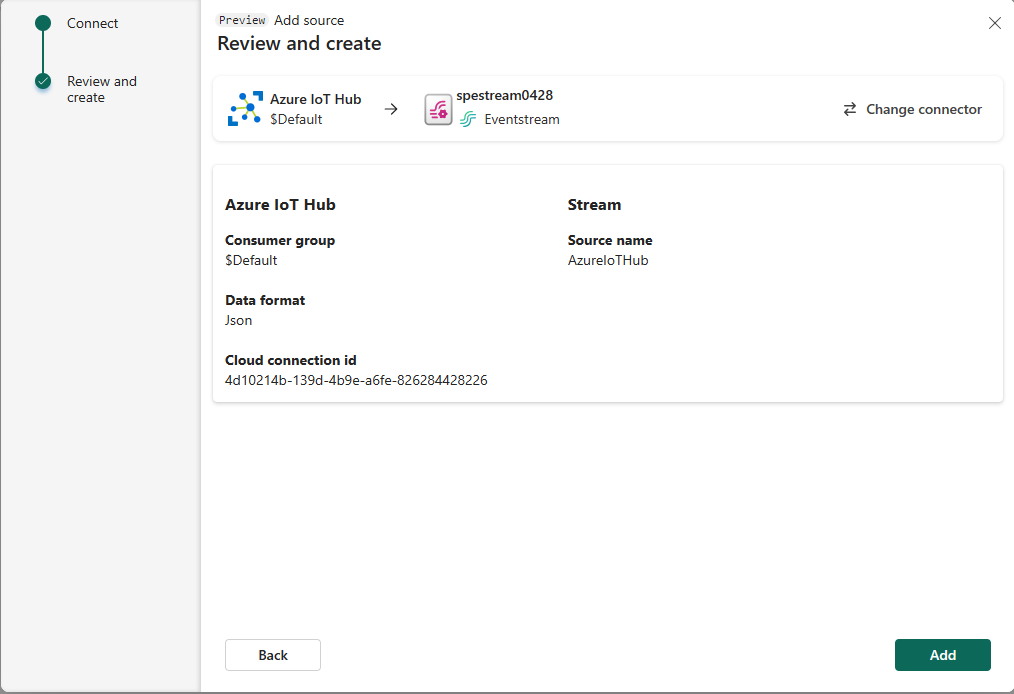
Now, on the Connect page of wizard, for Consumer group, enter the name of the consumer group. By default,
$Defaultis selected, which is the default consumer group for the IoT hub.For Data format, select a data format of the incoming real-time events that you want to get from your Azure IoT hub. You can select from JSON, Avro, and CSV data formats, and then select Connect.
Select Next at the bottom of the page.

On the Review and create page, review settings, and select Add.


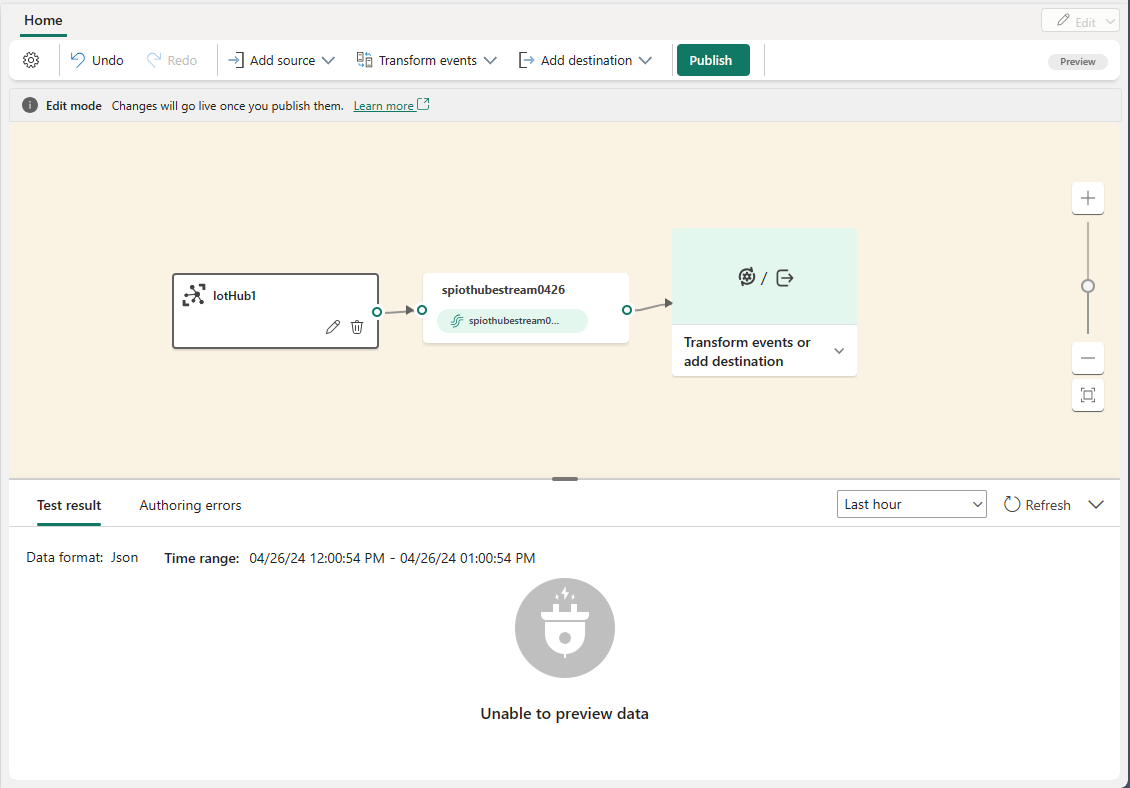
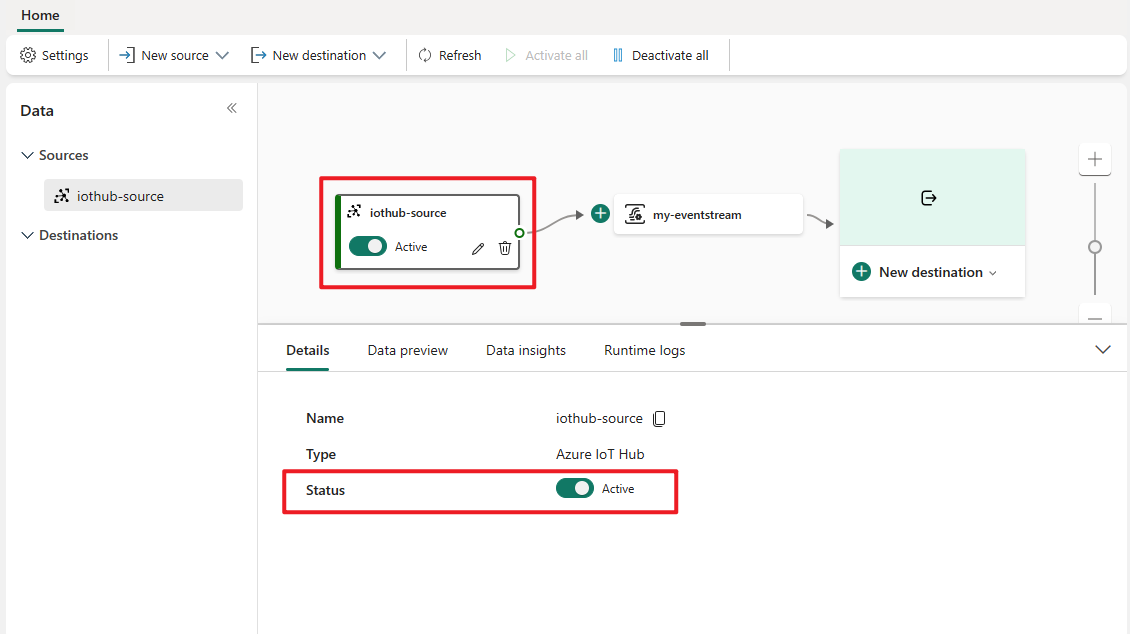
You see that the Azure IoT Hub source is added to your eventstream on the canvas in the Edit mode. To implement this newly added Azure IoT hub, select Publish on the ribbon.
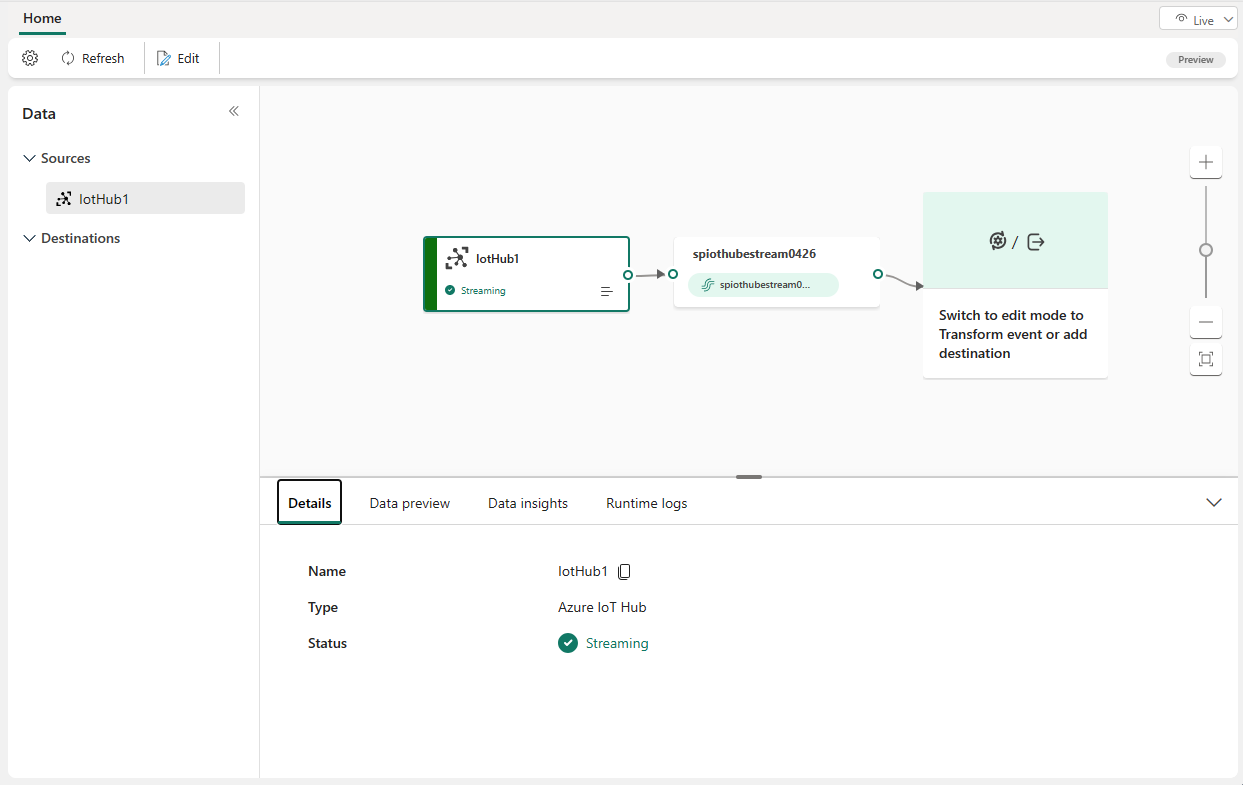
After you complete these steps, the Azure IoT hub is available for visualization in the Live view. Select the IoT hub tile in the diagram to see the page similar to the following one.
Related content
To learn how to add other sources to an eventstream, see the following articles:
Prerequisites
Before you start, you must complete the following prerequisites:
- Get access to a premium workspace with Contributor or above permissions where your eventstream is located.
- You need to have appropriate permission to get IoT hub's access keys. The IoT hub must be publicly accessible and not behind a firewall or secured in a virtual network.
Note
The maximum number of sources and destinations for one eventstream is 11.
Add an Azure IoT hub as a source
Follow these steps to add an Azure IoT hub as your eventstream source:
In the Eventstream editor, expand the New source drop-down menu within the node and choose Azure IoT Hub.

On the Azure IoT Hub configuration pane, enter the following details:
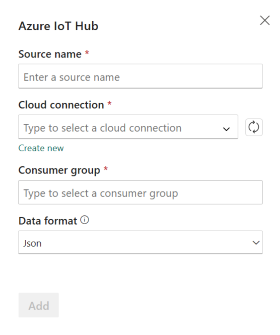
Source name: Enter a name for your Azure IoT Hub, such as iothub-source.
Cloud connection: Select an existing cloud connection that links your Azure IoT Hub to Microsoft Fabric. If you don't have one, proceed to step 3 to create a new cloud connection.
Data format. Choose a data format (AVRO, JSON, or CSV) for streaming your IoT Hub data into the eventstream.
Consumer group. Choose a consumer group from your Azure IoT Hub, or leave it as $Default. Then select Add to finish the Azure IoT Hub configuration.
Once it's added successfully, you can see an Azure IoT Hub source added to your eventstream in the editor.
To create a new cloud connection for your Azure IoT Hub, follow these steps:

Select Create new connection from the drop-down menu, fill in the Connection settings and Connection credentials of your Azure IoT Hub, and then select Create.
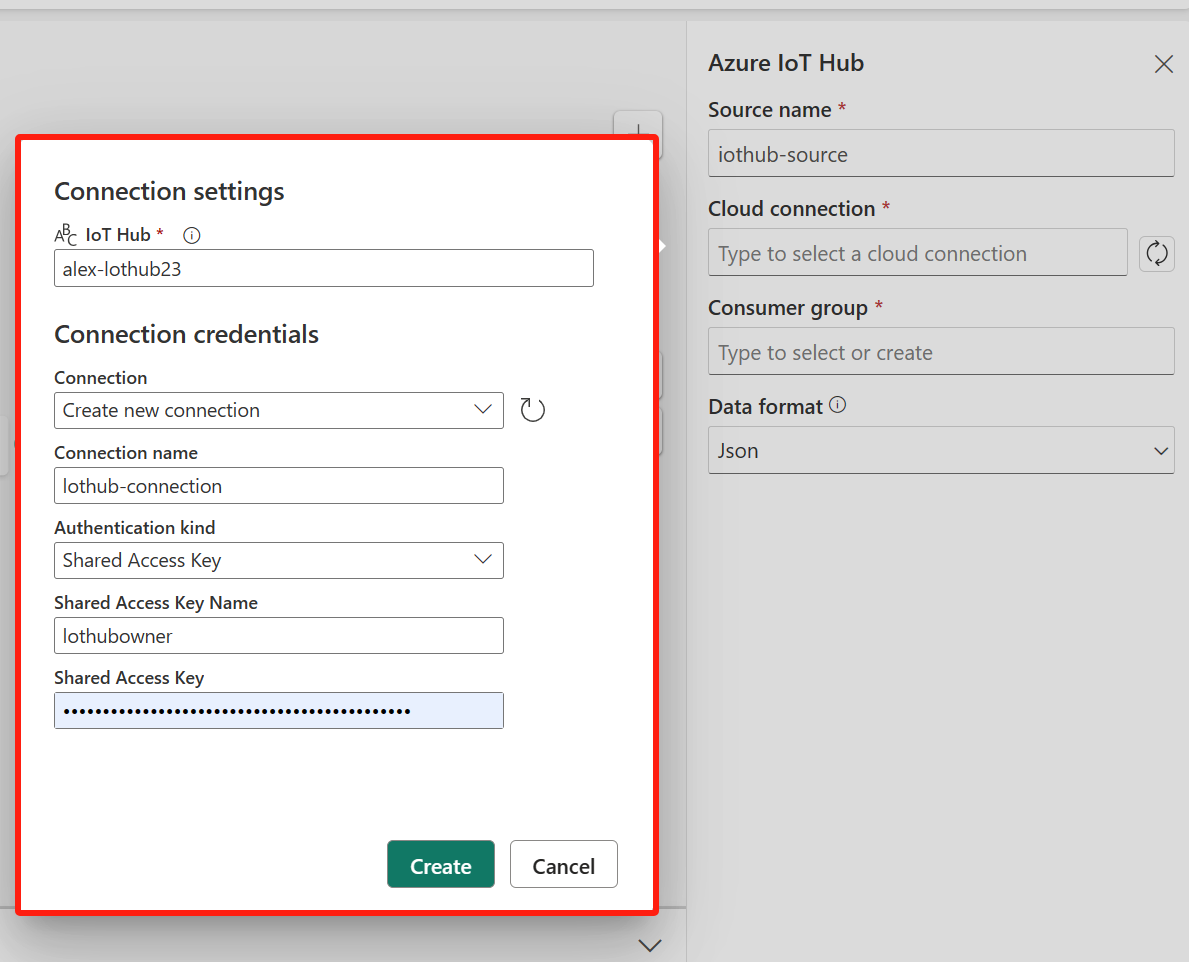
IoT Hub. Enter the name of the IoT Hub in the Azure portal.
Connection name. Enter a name for the new cloud connection, such as iothub-connection.
Shared access key name and Shared access key. Enter the connection credentials for your Azure IoT Hub. You can find it under Shared access policies in the Azure portal. You must have appropriate permissions to access any of the IoT Hub endpoints.

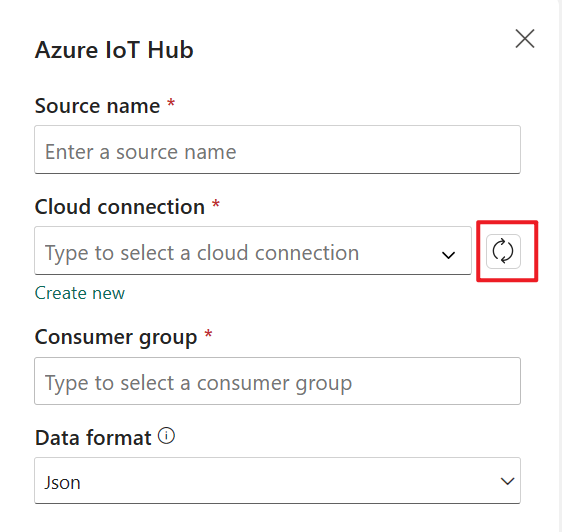
Return to the Azure IoT Hub configuration pane and select Refresh to load the new cloud connection.

Once the Azure IoT Hub is added to your eventstream, select Preview data to verify successful configuration. You should be able to preview incoming data to your eventstream.

Related content
To learn how to add other sources to an eventstream, see the following articles:
Feedback
Coming soon: Throughout 2024 we will be phasing out GitHub Issues as the feedback mechanism for content and replacing it with a new feedback system. For more information see: https://aka.ms/ContentUserFeedback.
Submit and view feedback for