Add Confluent Kafka source to an eventstream (preview)
This article shows you how to add Confluent Kafka source to an eventstream.
Confluent Cloud Kafka is a streaming platform offering powerful data streaming and processing functionalities using Apache Kafka. By integrating Confluent Cloud Kafka as a source within your eventstream, you can seamlessly process real-time data streams before routing them to multiple destinations within Fabric.
Important
Enhanced capabilities of Fabric event streams are currently in preview.
Note
This source is not supported in the following regions of your workspace capacity: West US3, Switzerland West.
Prerequisites
- Access to the Fabric premium workspace with Contributor or above permissions.
- A Confluent Cloud Kafka cluster and an API Key.
- Your Confluent Cloud Kafka cluster must be publicly accessible and not be behind a firewall or secured in a virtual network.
Note
The maximum number of sources and destinations for one eventstream is 11.
Add Confluent Cloud Kafka as a source
- Create an eventstream with selecting the preview toggle.
- Select Add external source.
Configure and connect to Confluent Kafka
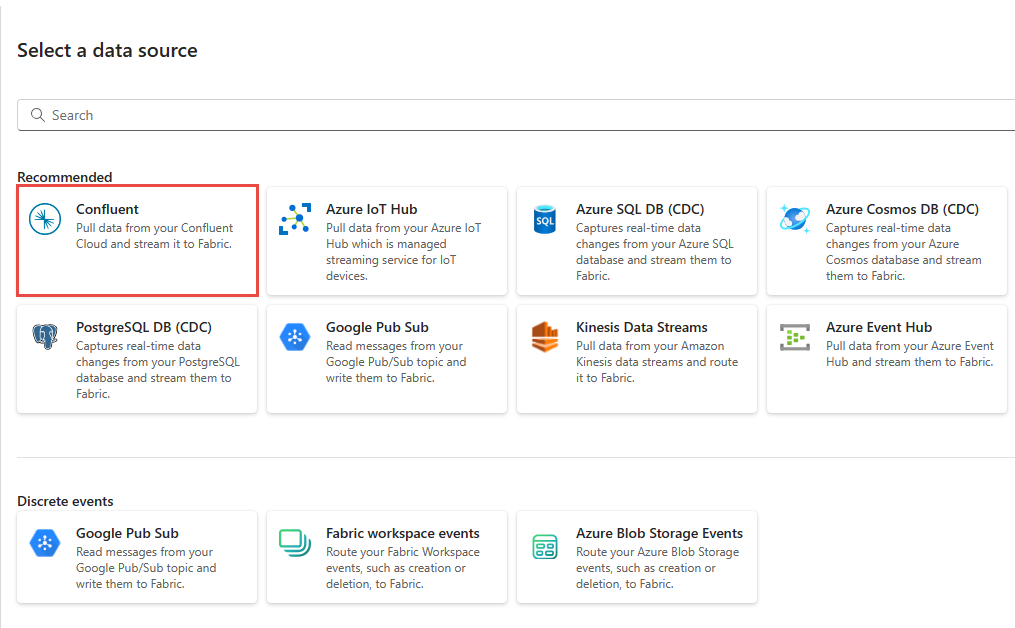
On the Select a data source page, select Confluent.
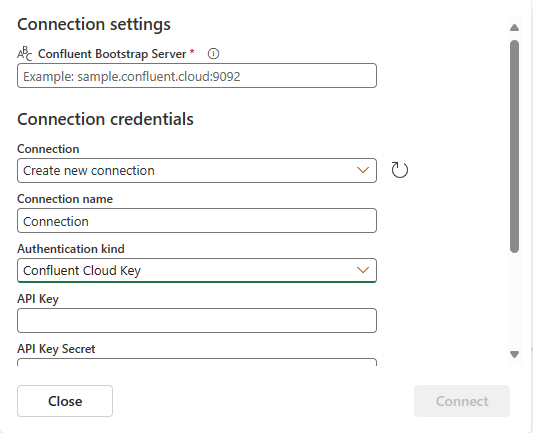
To create a connection to the Confluent Cloud Kafka source, select New connection.

In the Connection settings section, enter Confluent Bootstrap Server. Navigate to your Confluent Cloud home page, select Cluster Settings, and copy the address to your Bootstrap Server.
In the Connection credentials section, If you have an existing connection to the Confluent cluster, select it from the drop-down list for Connection. Otherwise, follow these steps:
- For Connection name, enter a name for the connection.
- For Authentication kind, confirm that Confluent Cloud Key is selected.
- For API Key and API Key Secret:
Navigate to your Confluent Cloud.
Select API Keys on the side menu.
Select the Add key button to create a new API key.
Copy the API Key and Secret.
Paste those values into the API Key and API Key Secret fields.
Select Connect
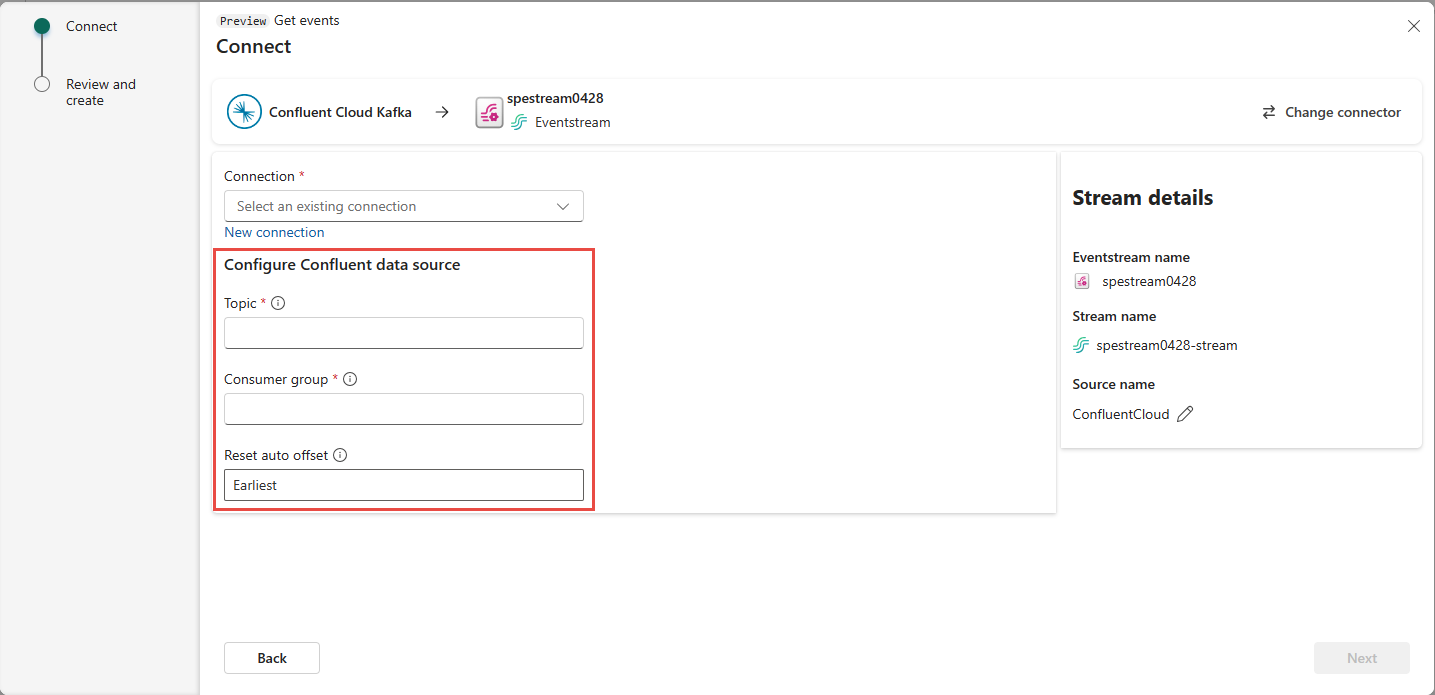
Scroll to see the Configure Confluent data source section on the page. Enter the information to complete the configuration of the Confluent data source.
- For Topic, enter a topic name from your Confluent Cloud. You can create or manage your topic in the Confluent Cloud Console.
- For Consumer group, Enter a consumer group of your Confluent Cloud. It provides you with the dedicated consumer group for getting the events from Confluent Cloud cluster.
- For Reset auto offset setting, select one of the following values:
Earliest – the earliest data available from your Confluent cluster
Latest – the latest available data
None – don't automatically set the offset.
Select Next. On the Review and create screen, review the summary, and then select Add.
You see that the Confluent Cloud Kafka source is added to your eventstream on the canvas in Edit mode. To implement this newly added Confluent Cloud Kafka source, select Publish on the ribbon.

After you complete these steps, the Confluent Cloud Kafka source is available for visualization in Live view.

Related content
Other connectors:
Feedback
Coming soon: Throughout 2024 we will be phasing out GitHub Issues as the feedback mechanism for content and replacing it with a new feedback system. For more information see: https://aka.ms/ContentUserFeedback.
Submit and view feedback for