Add facilities and equipment resources
Introduction
Facilities and equipment are resources you use to perform services for your customers. Facilities can be physical spaces like service bays or conference rooms, and equipment could be tools or other assets. Add these resources to Dynamics 365 Customer Service to ensure optimal services to your customers.
Add facilities or resources
Before you begin, make sure you have the System Administrator security role or equivalent permissions in Microsoft Dynamics 365.
Navigate to the Customer Service admin center or Customer Service Hub app, and perform the following steps:
In the site map, select Service Scheduling in Operations. The Service Scheduling page appears.
In the Facilities/Equipment section, select Manage.
The Local Facilities/Equipment view is displayed. You can switch between various system views using the drop-down list.
Select New.
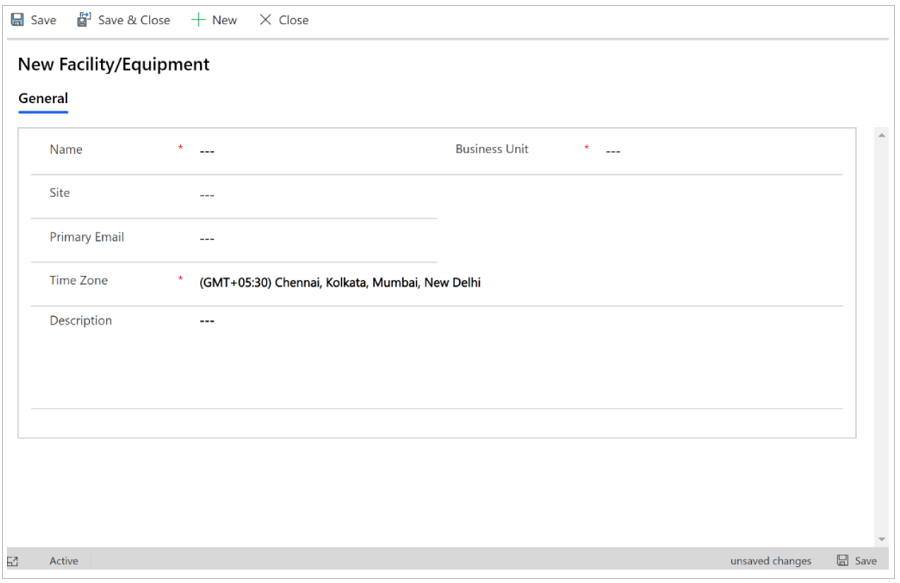
Fill in the information as required:
Name: Enter the name of the facility or equipment you want to add for service scheduling.
Business Unit: Dynamics 365 Customer Service enters the business unit automatically. To select a different business unit, select the Lookup button, and then select the business unit from the list.
Site. Select the location where the facility or equipment is located.
Note
Make sure the site and customer are in the same location. Resources for a given service activity should also be located at the same site.
Primary Email: Enter the email address of the site manager or equipment manager. If there are any updates or cancellations related to the schedule, facilities, or equipment, notifications are sent to this email address.
Time Zone: Select the appropriate time zone to determine availability for the facility or equipment. By default, this is set to the time zone you’ve selected in the General tab of the Set Personal Options page. More information: Set personal options
Description: Add details about the facility or equipment, such as the numbers, size, make, or model.
When you're finished entering details, select Save or Save & Close.

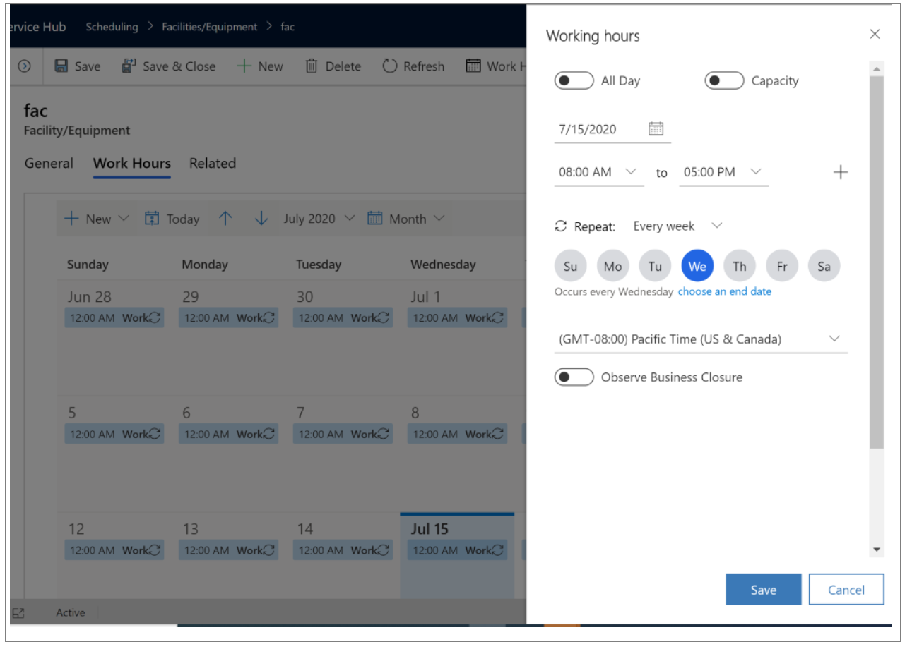
Set up the work hour calendar.

Related information
Unified Interface-based service scheduling overview